> For the complete documentation index, see [llms.txt](https://help.aikido.dev/llms.txt). Markdown versions of documentation pages are available by appending `.md` to page URLs; this page is available as [Markdown](https://help.aikido.dev/docs/docs-ja/kdosukyan/connect-your-source-code/connect-bitbucket-data-center/connect-bitbucket-data-center-broker-set-up.md).
# Bitbucket Data Centerを接続する(Brokerセットアップ)
Aikido を使うと、セルフマネージドの Bitbucket インスタンスを接続して、コードをスキャンし、保護できます。以下の手順に従って、Bitbucket Data Center インスタンスを Aikido に接続してください。
### 始める前に
* これを設定する人は、Bitbucket Data Center インスタンスの両方にアクセスできる必要があります **および** 接続したい Bitbucket プロジェクト。
## 設定
{% stepper %}
{% step %}
**Aikidoアカウントを作成**
Bitbucket Data Center インスタンスを接続するには、まず Google または Microsoft を使って Aikido にサインアップまたはログインします。 [サインアップ画面](https://app.aikido.dev/login)、次をクリックします: **Google / Microsoft**.
{% endstep %}
{% step %}
**Bitbucket Data Center のセットアップを開始する**
認証が完了したら、新しいワークスペースを作成するには **Bitbucket Data Center** Bitbucket セクションで。
{% endstep %}
{% step %}
**ブローカーアクセスを有効にする**
有効にする **Aikidoブローカー** 「Advanced Connection Options」セクションのトグルをクリックして **グループを作成** 続行するには。
{% endstep %}
{% step %}
**ブローカーを設定する**
以下のガイドに従ってブローカーを設定してください。デプロイしたら、ここに戻ってGitLabのセットアップを完了してください。
{% content-ref url="/pages/57eb4d0e1ea0df52e494af68c47a0c2a1e884bc1" %}
[社内アプリケーション向けの Aikido Broker](/docs/docs-ja/miscellaneous-info/aikido-broker-for-internal-applications.md)
{% endcontent-ref %}
{% endstep %}
{% step %}
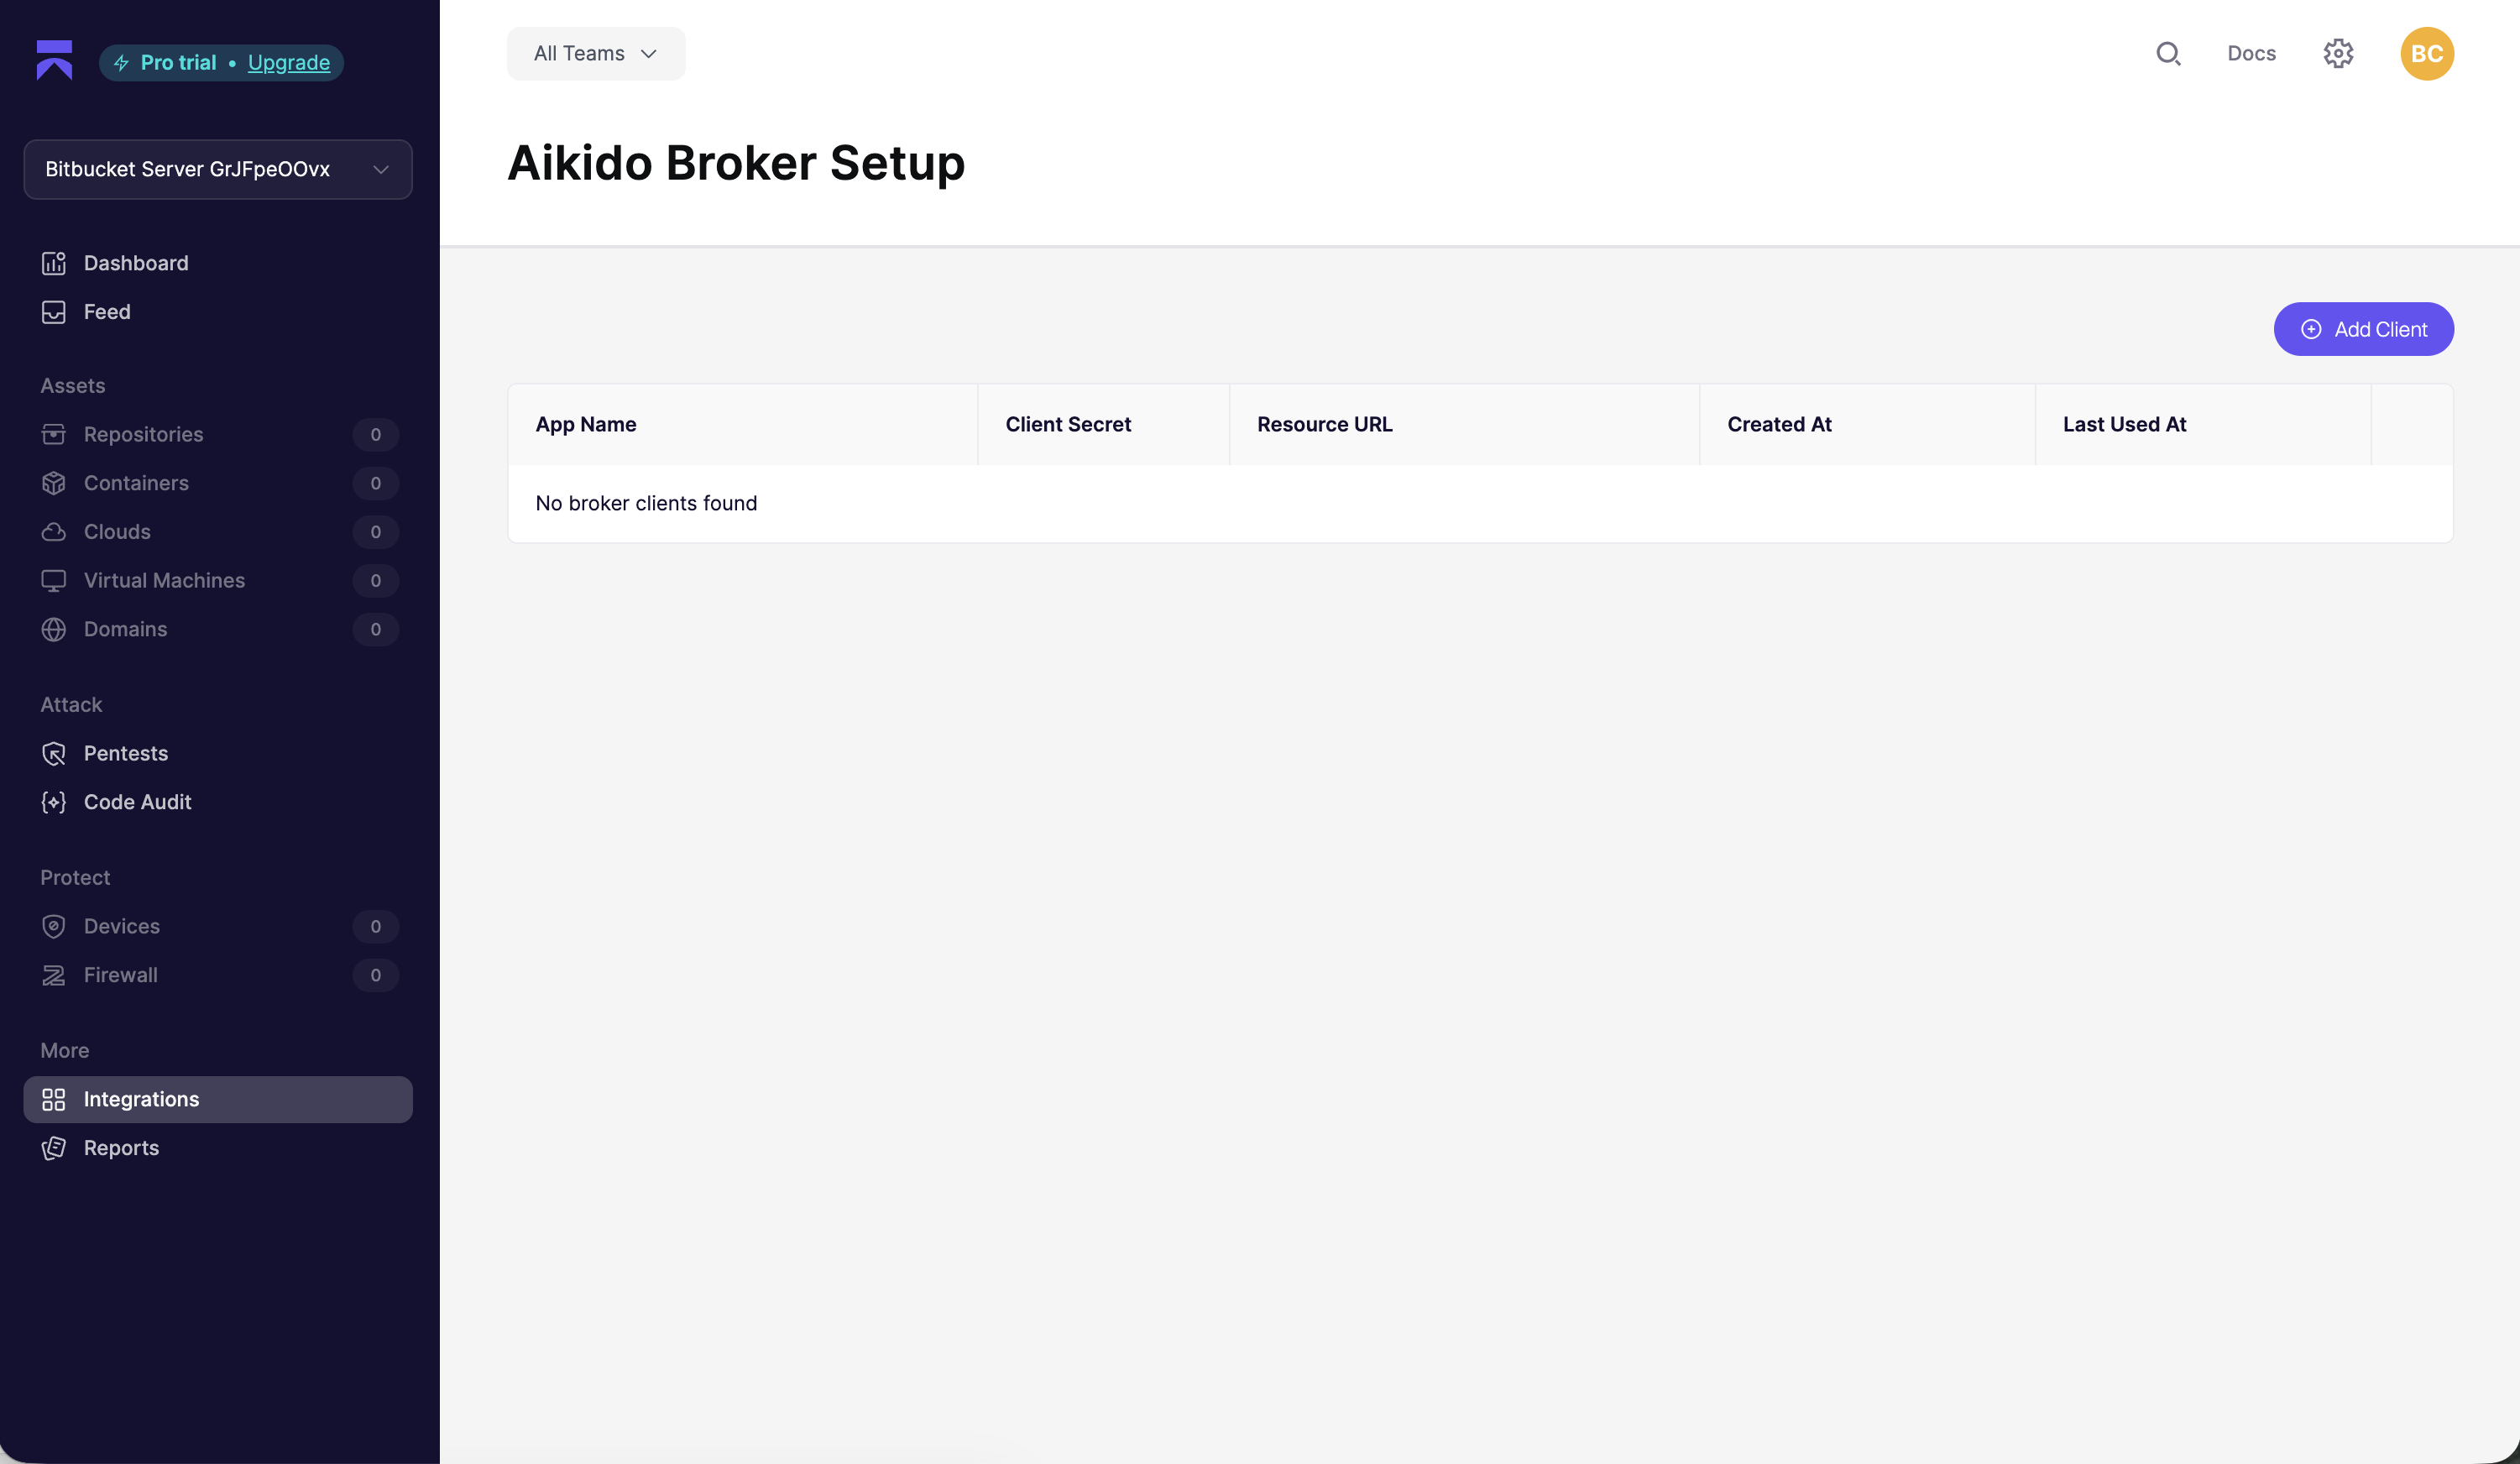
**Bitbucket Data Center のセットアップを完了する**
ブローカーを作成して環境にデプロイした後、Bitbucket Data Center のセットアップを完了できます。
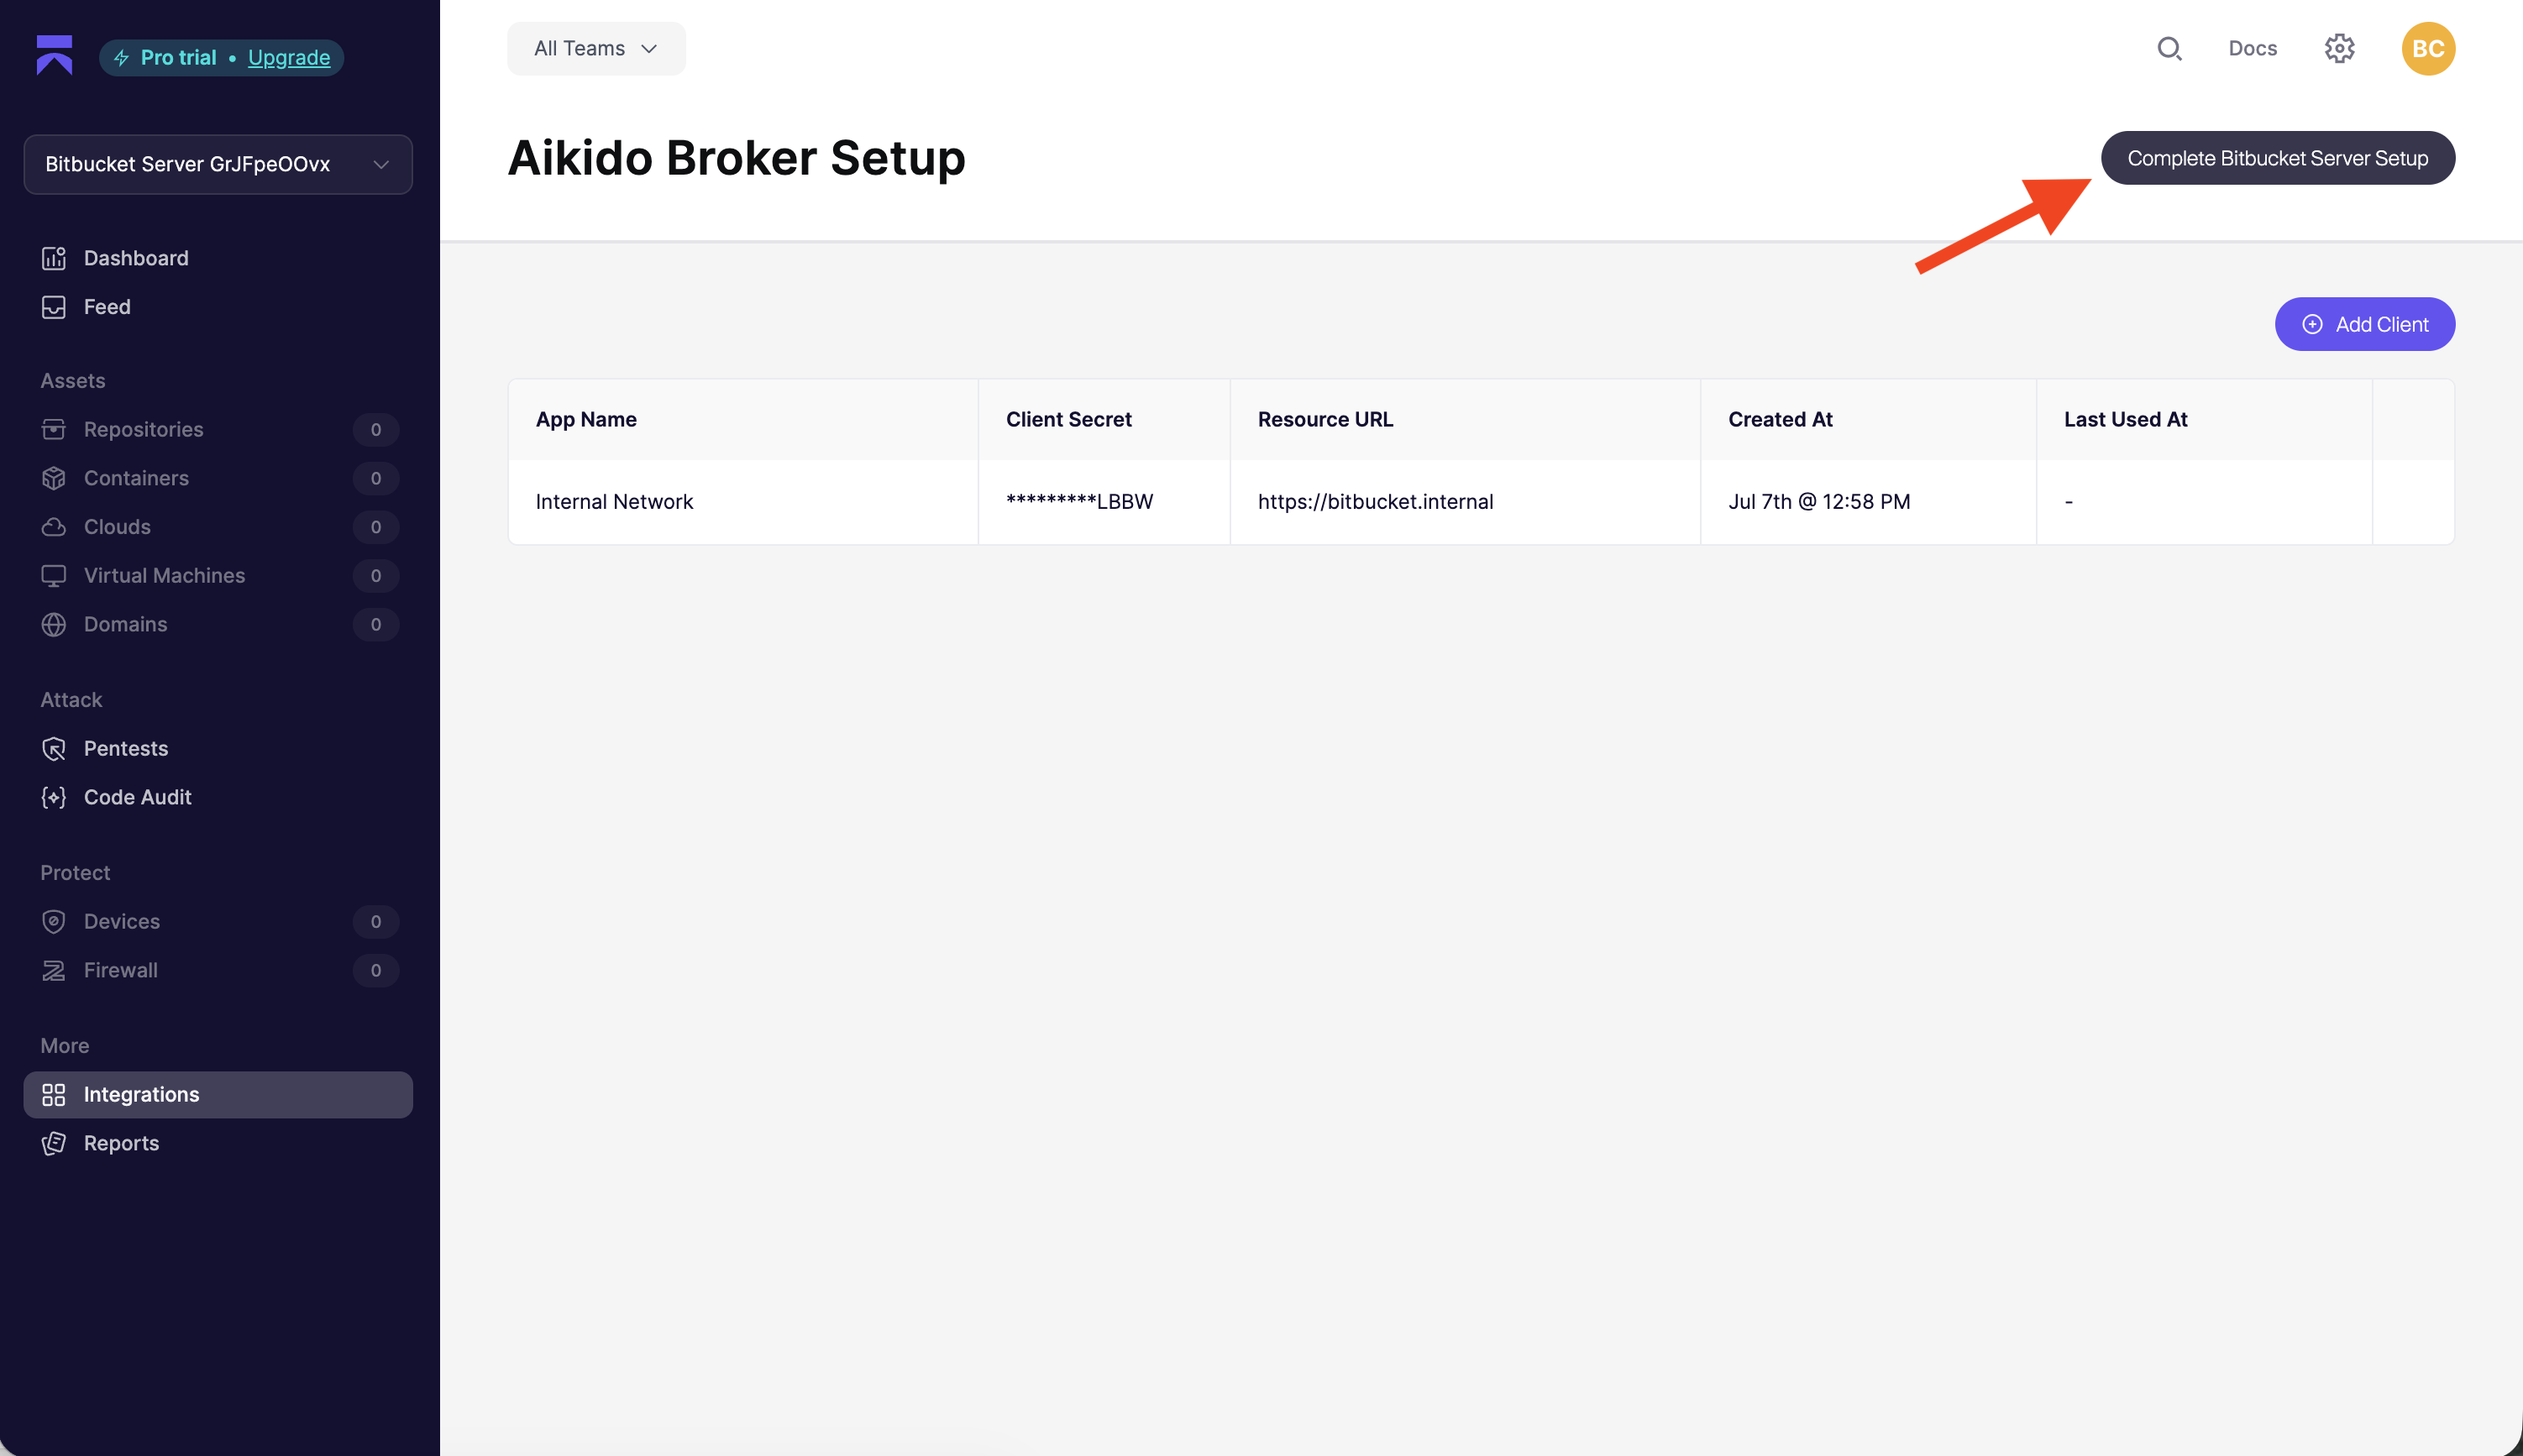
まず、次をコピーします: **ブローカーURL**. 次のような形式です:
```
https://55673-355dsfwea68cb.aikidobroker.com
```
次に、次をクリックします **Bitbucket Server のセットアップを完了する**.
{% endstep %}
{% step %}
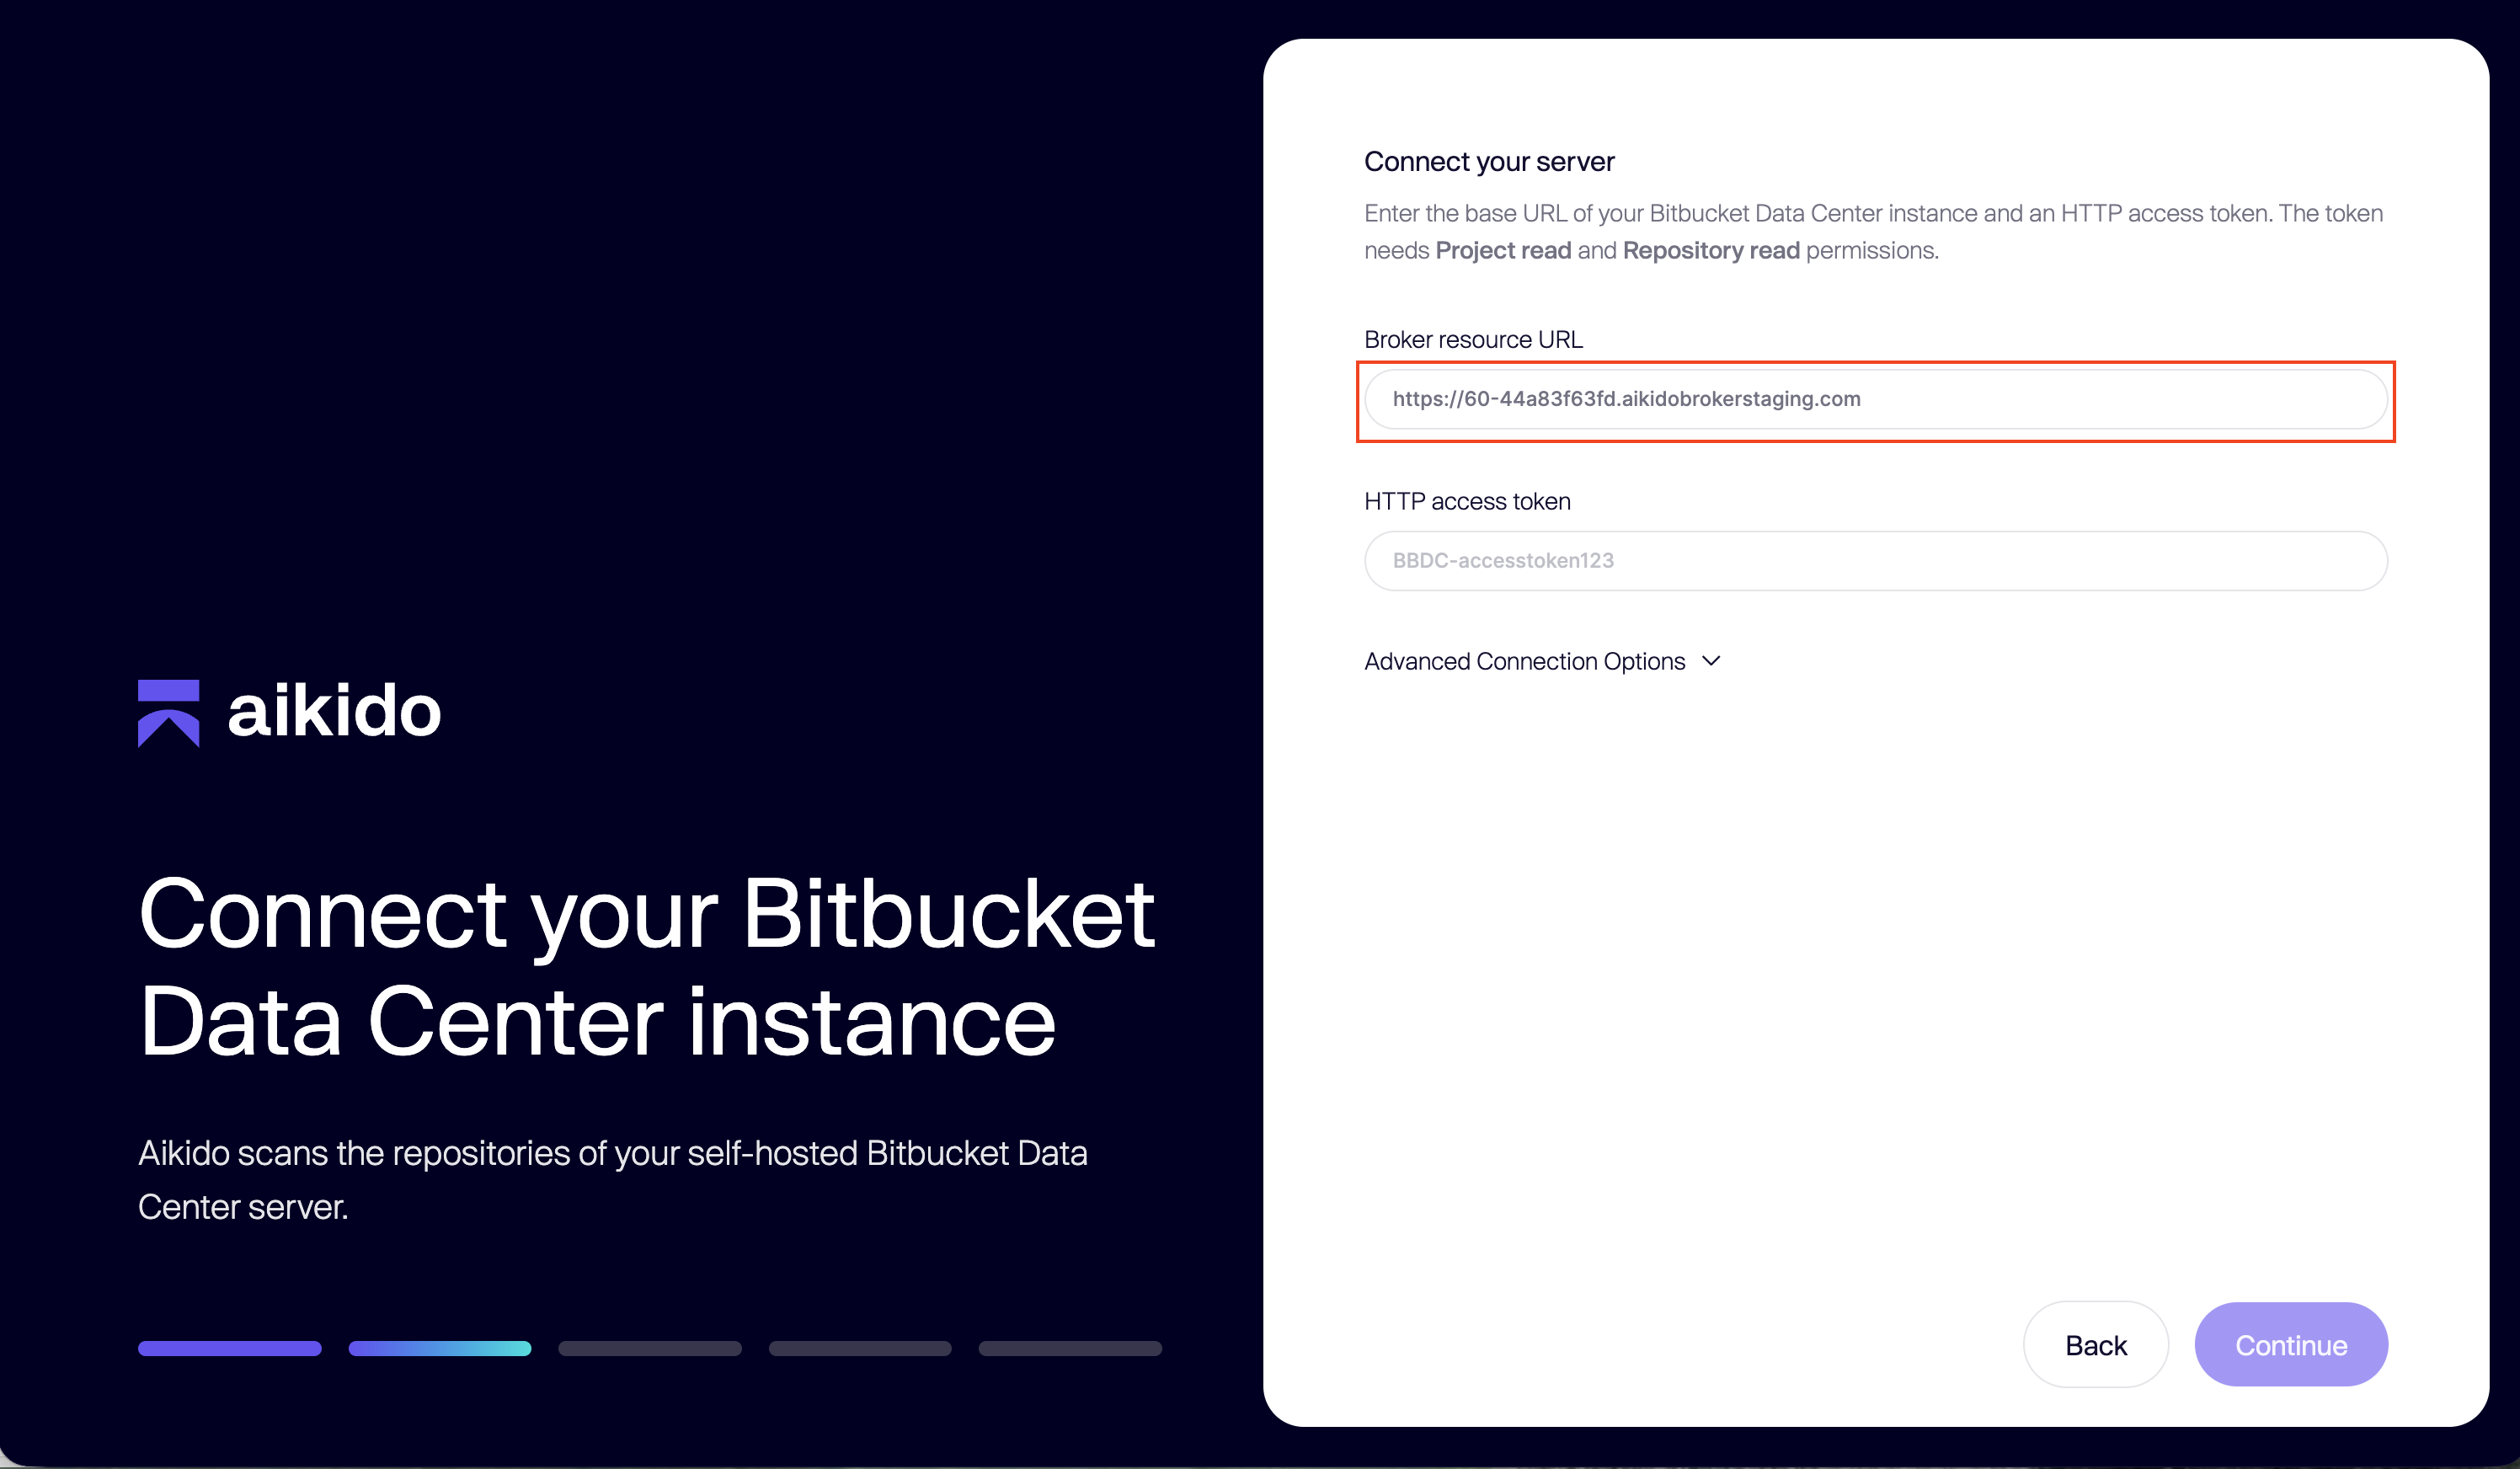
**ブローカーURLを入力する**
前の手順で取得したブローカーのリソースURLを、「server URL」の入力欄に貼り付けます。
{% endstep %}
{% step %}
**HTTP アクセストークンを作成する**
次の場所で見つけられます `HTTPアクセストークン` の下に **プロフィール** → **アカウント管理** → **HTTPアクセストークン** → **トークンを作成**.
**必要なトークン権限**
Aikidoは、オンプレミスのBitbucketインスタンスに対して次のトークン権限を要求します:
* **プロジェクト:** 書き込み
* **リポジトリ:** 書き込み
**なぜ書き込みアクセスが必要なのですか?**
AutoFix(マージ可能なPRの作成)やPRチェック(プルリクエストへのステータスチェックやコメントの投稿)を含むAikidoの全機能を利用するには、書き込みアクセスが必要です。
**スキャンのみが必要な場合**
チームがAikidoをリポジトリのスキャンとAIペンテストにのみ使用する場合、 **読み取り権限** で十分です。読み取り専用アクセスのトークンを設定すれば、すべてのスキャン機能が想定どおりに動作します。
{% endstep %}
{% step %}
**インストールを完了する**
をクリックしたら **次に、グループを接続**、最初に使用するグループを選択してください。後からいつでもさらにグループを接続できます。
最後の手順で、Aikidoに監視させたいリポジトリを選択してください。
{% endstep %}
{% endstepper %}
---
# Agent Instructions
This documentation is published with GitBook. GitBook is the documentation platform designed so that both humans and AI agents can read, navigate, and reason over technical content effectively. Learn more at gitbook.com.
## Querying This Documentation
If you need additional information that is not directly available in this page, you can query the documentation dynamically by asking a question.
Perform an HTTP GET request on the current page URL with the `ask` query parameter, and the optional `goal` query parameter:
```
GET https://help.aikido.dev/docs/docs-ja/kdosukyan/connect-your-source-code/connect-bitbucket-data-center/connect-bitbucket-data-center-broker-set-up.md?ask=&goal=
```
`ask` is the immediate question: it should be specific, self-contained, and written in natural language.
`goal` is optional and describes the broader end goal you are ultimately trying to accomplish on behalf of the user. GitBook uses it to tailor the answer towards what is most useful for that goal.
The response will contain a direct answer to the question and relevant excerpts and sources from the documentation.
Use this mechanism when the answer is not explicitly present in the current page, you need clarification or additional context, or you want to retrieve related documentation sections.