# Azure DevOps: PR Gating via Aikido Dashboard
{% hint style="warning" %}
We recommend setting up this integration with a **newly created user** in Azure (e.g. called Aikido). The commenting feature uses the name of the user who has set up the integration.
{% endhint %}
{% hint style="warning" %}
Make sure the person who sets up the integration is a Project Admin in Azure DevOps
{% endhint %}
### Introduction
You can easily configure Azure DevOps PR Gating via the Aikido interface. This functionality allows you to block any **newly introduced** issues for a certain threshold that you decide. This doc focusses on managing configurations in bulk - multiple repos at the same time - without code.
### Use Cases
* **Bulk Repository Management**: Easily specify and manage configurations for multiple repositories at once through the Aikido interface.
* **Zero Code Integration**: Install the Aikido app on Azure DevOps to manage checks without embedding any code, simplifying the setup process.
* **Cost Efficiency**: By managing Azure DevOps Checks through Aikido, you avoid using CI minutes on Azure DevOps, leading to significant cost savings.
### Setting up Azure DevOps CI
**Step 1.** Go to the [Integrations Page](https://app.aikido.dev/settings/integrations) and select Azure Pipelines in the CI gating section.

**Step 2 (optional).** Select **PR Gating Configuration via Aikido Dashboard** in the modal that pops up. **Note: this modal will only popup if you have already used Azure Pipelines in code**.

**Step 3.** Grant Aikido the necessary permissions.

> When the installation of the Azure DevOps checks integration does not work via[ the OAuth flow](https://help.aikido.dev/pr-and-release-gating/azure-pr-gating/azure-pipelines-ci-pr-gating-via-aikido-dashboard), you can also configure it to work with a[ Personal Access Token (PAT).](https://help.aikido.dev/pr-and-release-gating/azure-pipelines-ci-pr-gating-via-aikido-dashboard-with-a-personal-access-token)
**Step 4.** Aikido redirects you to the [Azure Pipelines page](https://app.aikido.dev/settings/integrations/azure-devops/checks) with an overview of your repos. You can start configuring your repos. We recommend starting out with 1 repo to make sure everything works well.
**Step 5. Select repos in bulk** and click **Setup PR Scans** button in the floating bulk actions bar on the bottom
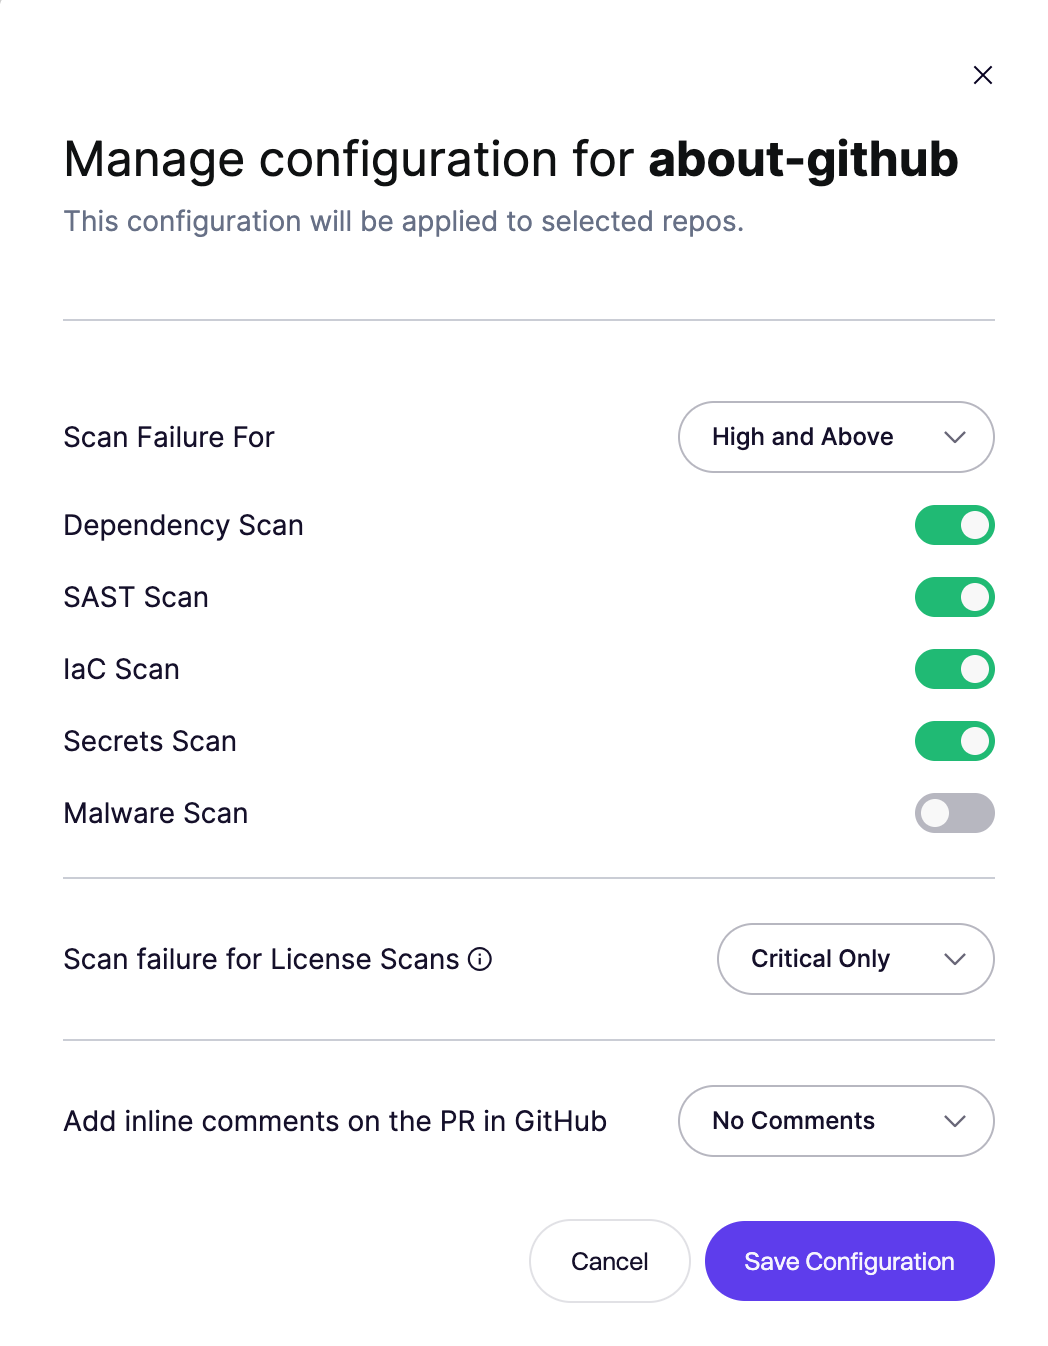
**Step 6**.This will trigger the modal to choose the severity level for failure and the scans you want to execute.
{% hint style="info" %}
If you've added new repositories after the initial setup, you'll need to configure those repos as well.
To apply a default configuration automatically, see [Default PR/MR gating configuration for new repositories](https://help.aikido.dev/pr-and-release-gating/aikido-ci-gating-functionality/default-pr-mr-gating-configuration-for-new-repositories).
{% endhint %}
When creating or updating PR's, you'll now see the status of the checks on the pull request in Azure DevOps.

### Adding Exceptions for specific repos
You might want to have 1 specific repo where the configuration slightly differs. You can easily add exceptions by clicking the triple dots on a repo item or just select 1 or more items and go through the **Configure Scans** process again.

## Configure the PR gating to block pull request
The PR gating functionality can only make its own pipeline fail, but won't block the PR from getting merged. In order to ensure that a failing gate also prevents the PR from merging, you can follow these steps:
1. Go to the project's settings page and navigate to "Repositories"
2. Select the relevant repository where you'd like to make the PR gate required

3. Navigate to the "Policies" tab
4. Select the PR's target branch where you'd like to enforce the PR gating to be blocking, this is usually the default branch of the repository called "main" or "master".

5. Now add a new "Status Check" by clicking the "+" icon
6. Select the Aikido PR checks from the dropdown and make sure that you select "Required"

7. And lastly, hit "Save". The PR gating will now be required to be successful for merging PR's.
This can also be setup in bulk for all repositories in project via the "Policies" and adding a branch protection rule. It might be that the "Aikido Security/check code for vulnerabilities" check is not available in the dropdown, in which case you can add it manually there.
