> For the complete documentation index, see [llms.txt](https://help.aikido.dev/llms.txt). Markdown versions of documentation pages are available by appending `.md` to page URLs; this page is available as [Markdown](https://help.aikido.dev/code-scanning/connect-your-source-code/connect-bitbucket-data-center/connect-bitbucket-data-center-broker-set-up.md).
# Connect Bitbucket Data Center (Broker Set-Up)
Aikido lets you connect a self-managed Bitbucket instance to scan and secure your code. Follow the steps below to connect your Bitbucket Data Center instance to Aikido.
### Before you start
* The person setting this up needs access to both the Bitbucket Data Center instance **and** the Bitbucket project you want to connect.
## Configuration
{% stepper %}
{% step %}
**Create an Aikido account**
To connect your Bitbucket Data Center instance, first sign up or log in to Aikido using Google or Microsoft. On the [signup screen](https://app.aikido.dev/login), click **Google / Microsoft**.
{% endstep %}
{% step %}
**Start the Bitbucket Data Center setup**
Once you’re authenticated, create a new workspace by clicking **Bitbucket Data Center** in the Bitbucket section.
{% endstep %}
{% step %}
**Enable Broker access**
Enable the **Aikido broker** by clicking the toggle in the "Advanced Connection Options" section. Click **Create Group** to continue.
{% endstep %}
{% step %}
**Configure the Broker**
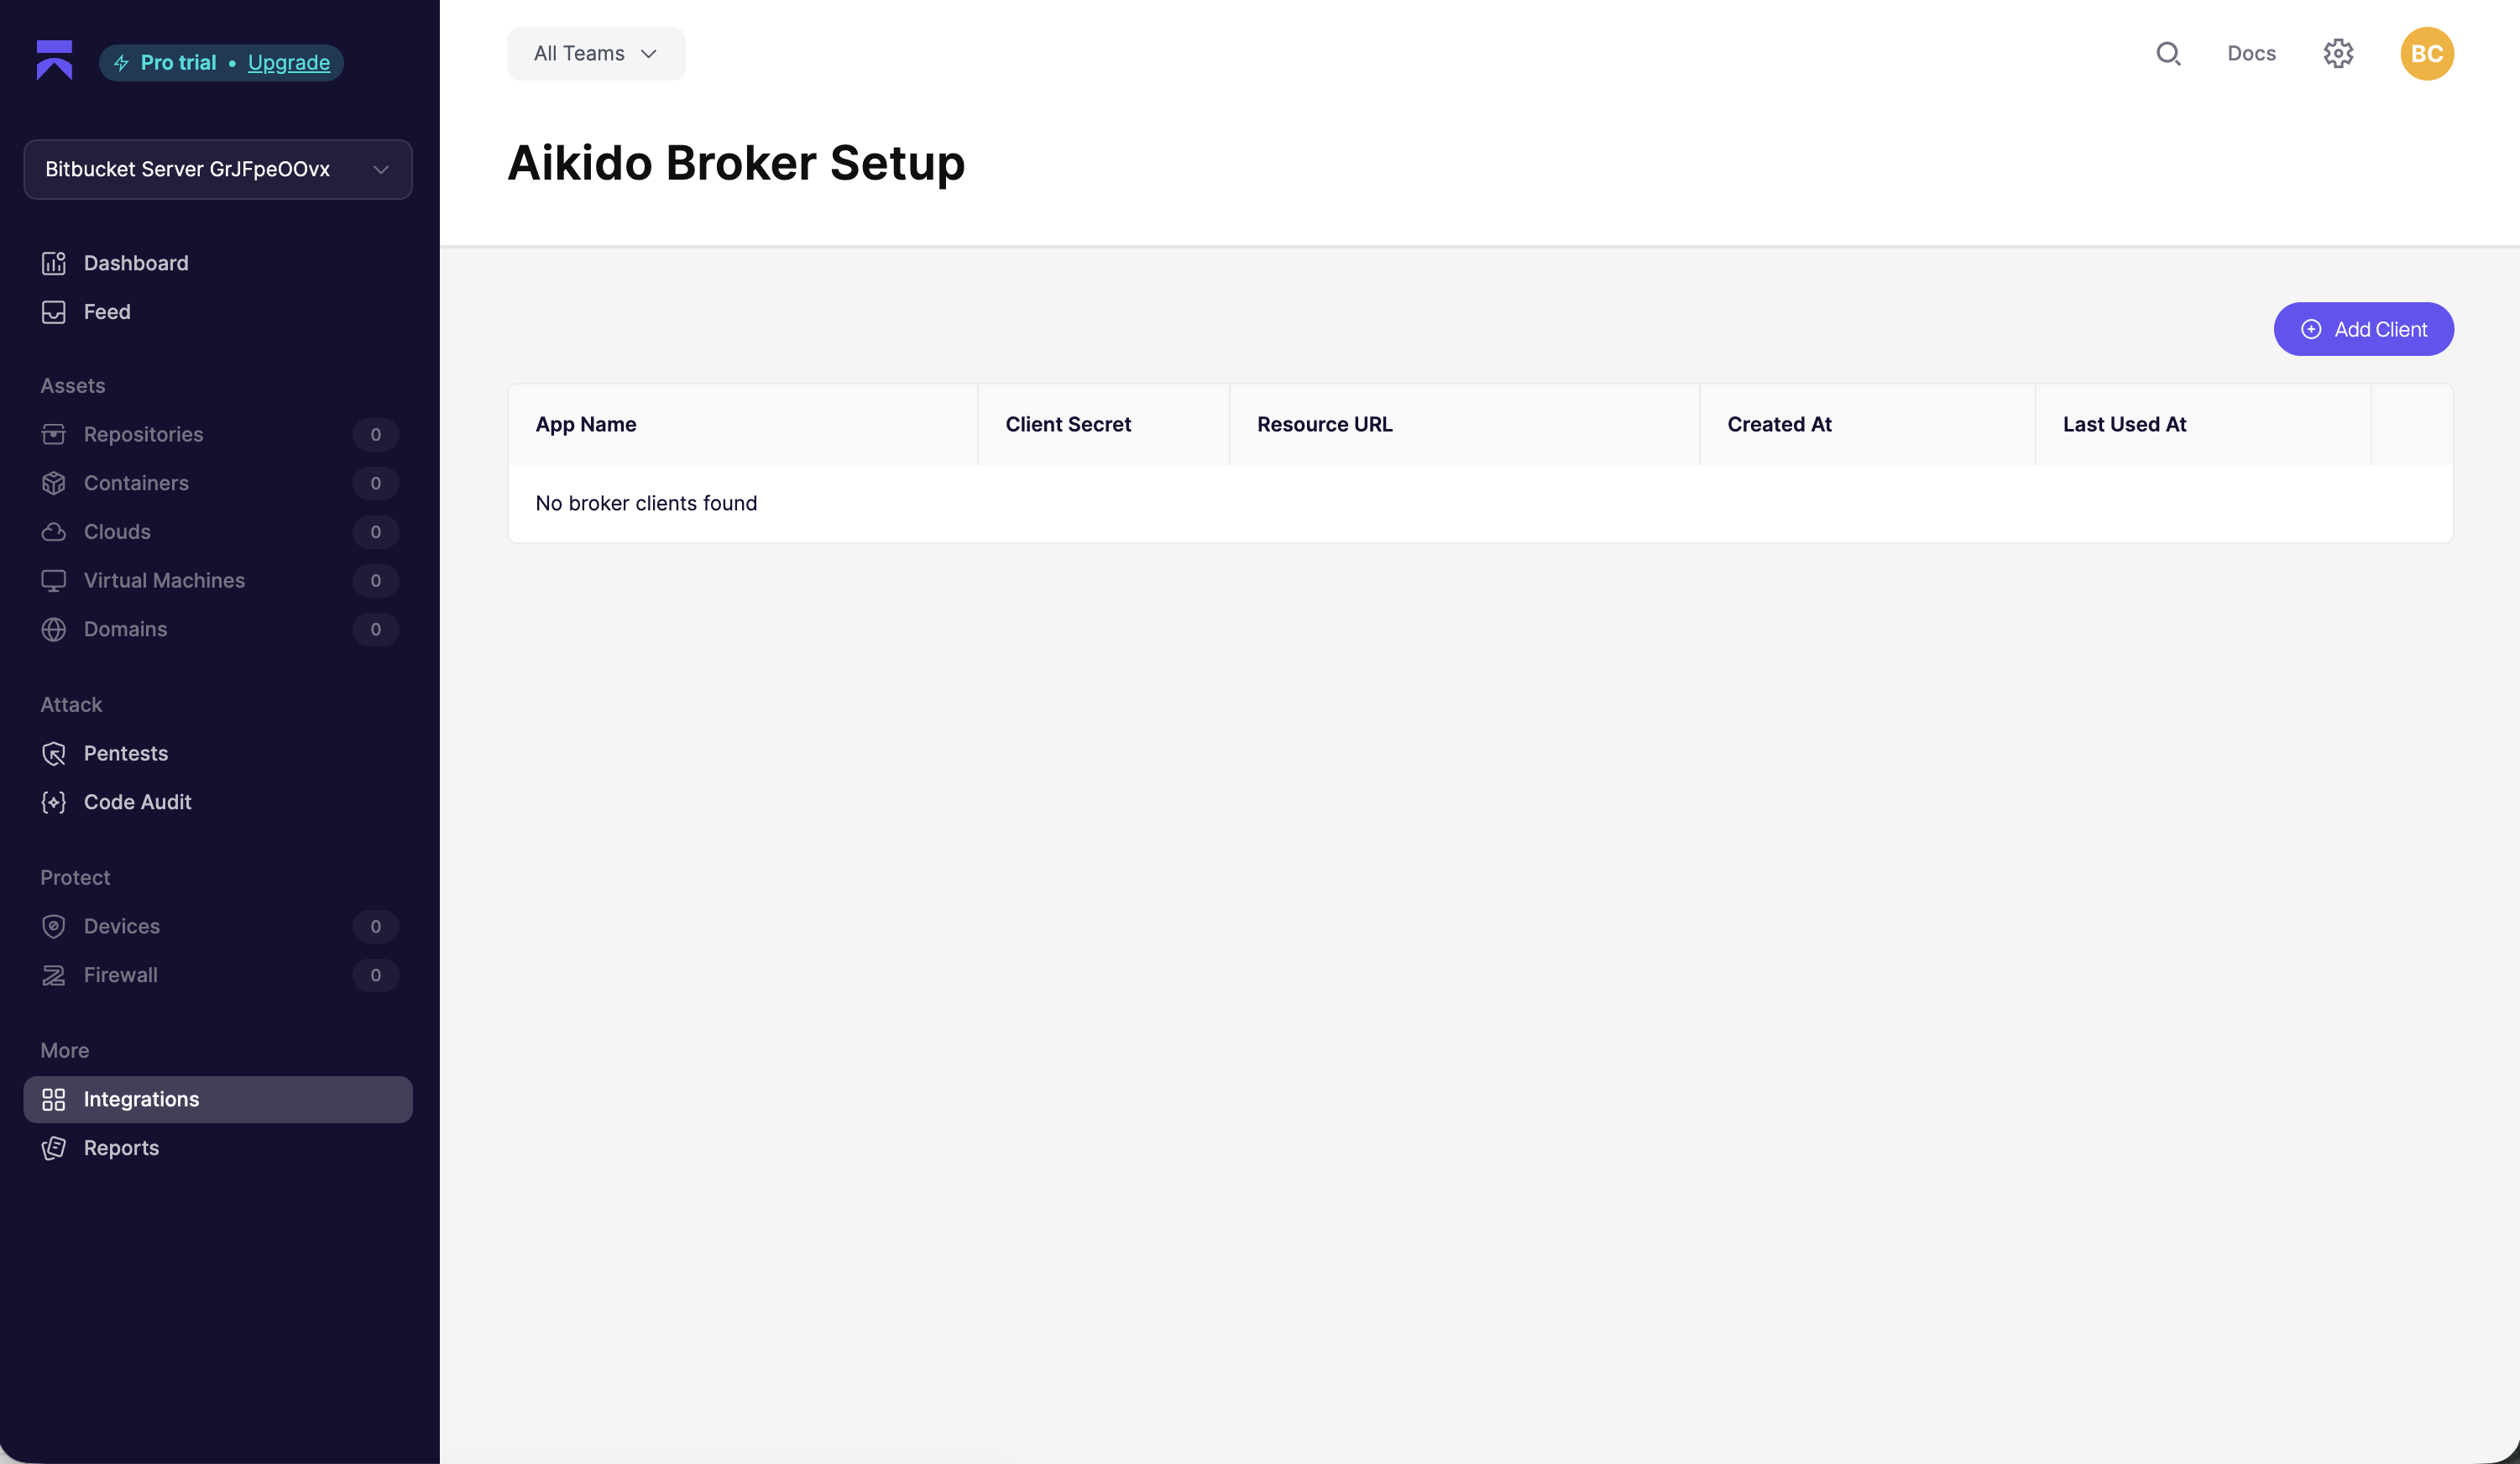
Configure the Broker using the guide below. After you deploy it, return here to finish the GitLab setup.
{% content-ref url="/pages/h0JtJS4MeX5E8efcCvRF" %}
[Aikido Broker for Internal Applications](/miscellaneous-info/aikido-broker-for-internal-applications.md)
{% endcontent-ref %}
{% endstep %}
{% step %}
**Complete Bitbucket Data Center setup**
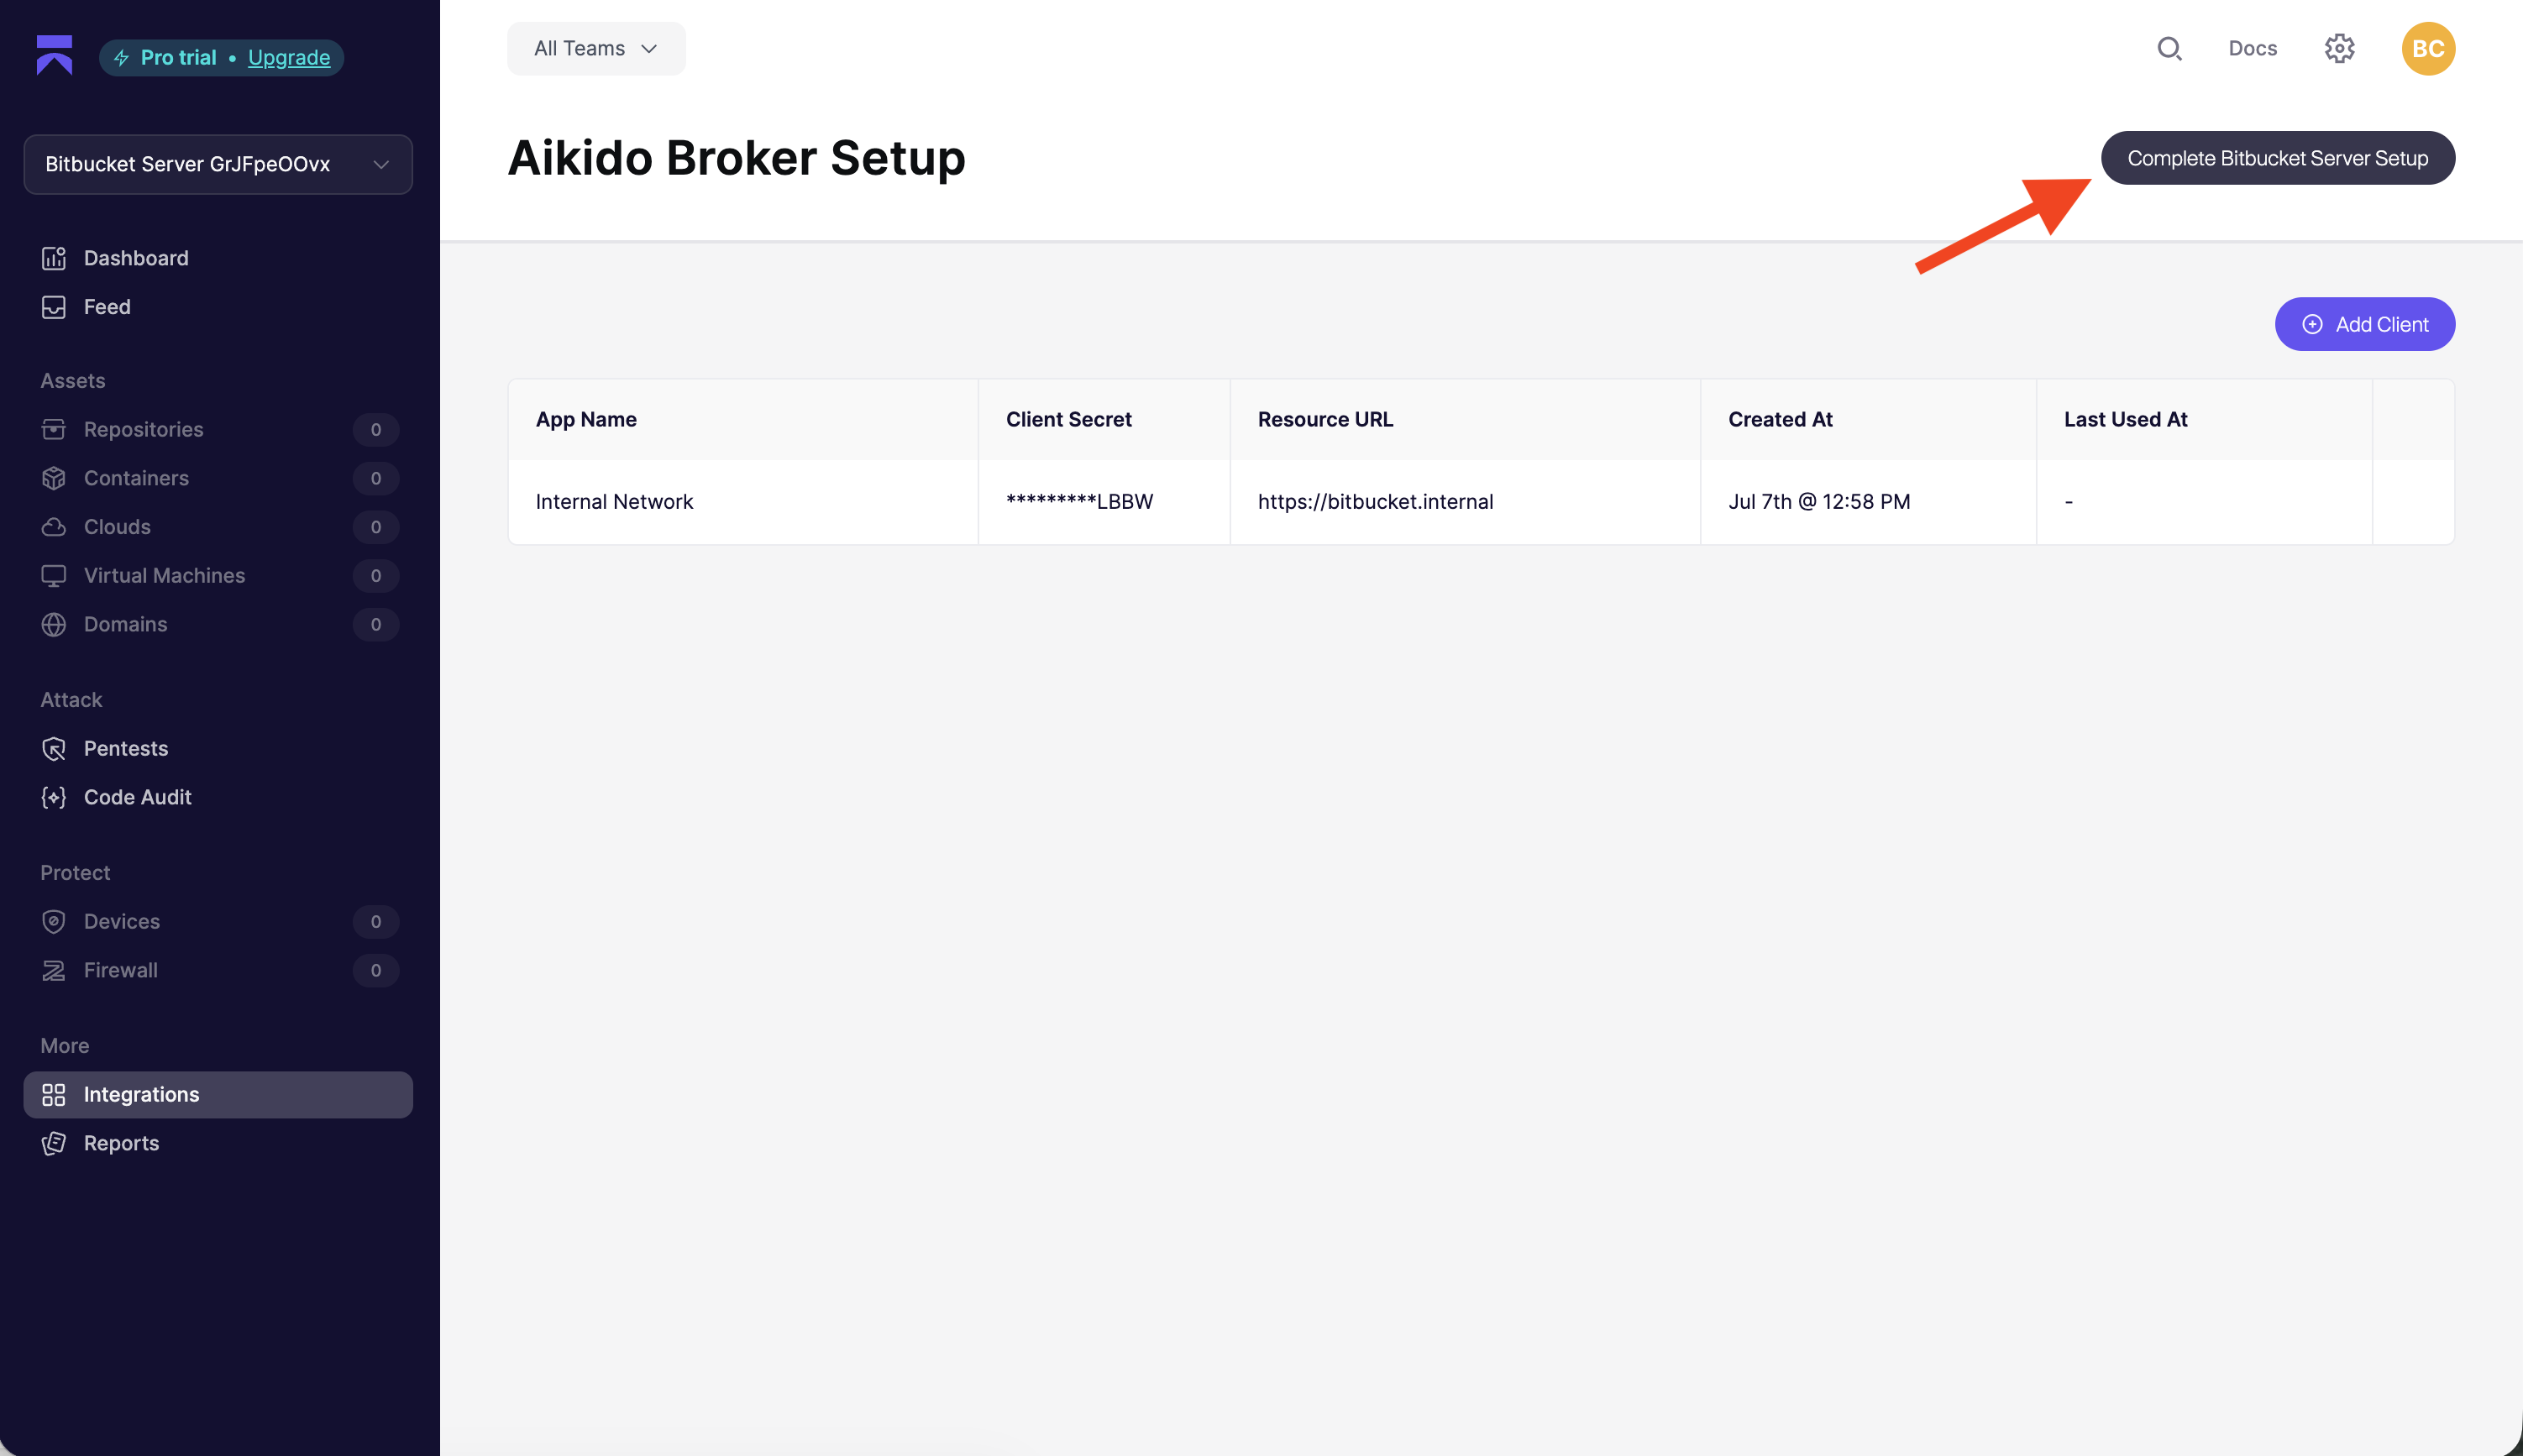
After you create the broker and deploy it in your environment, you can complete the Bitbucket Data Center setup.
First, copy the **Broker URL**. It looks similar to this:
```
https://55673-355dsfwea68cb.aikidobroker.com
```
Then click **Complete Bitbucket Server Setup**.
{% endstep %}
{% step %}
**Enter the Broker URL**
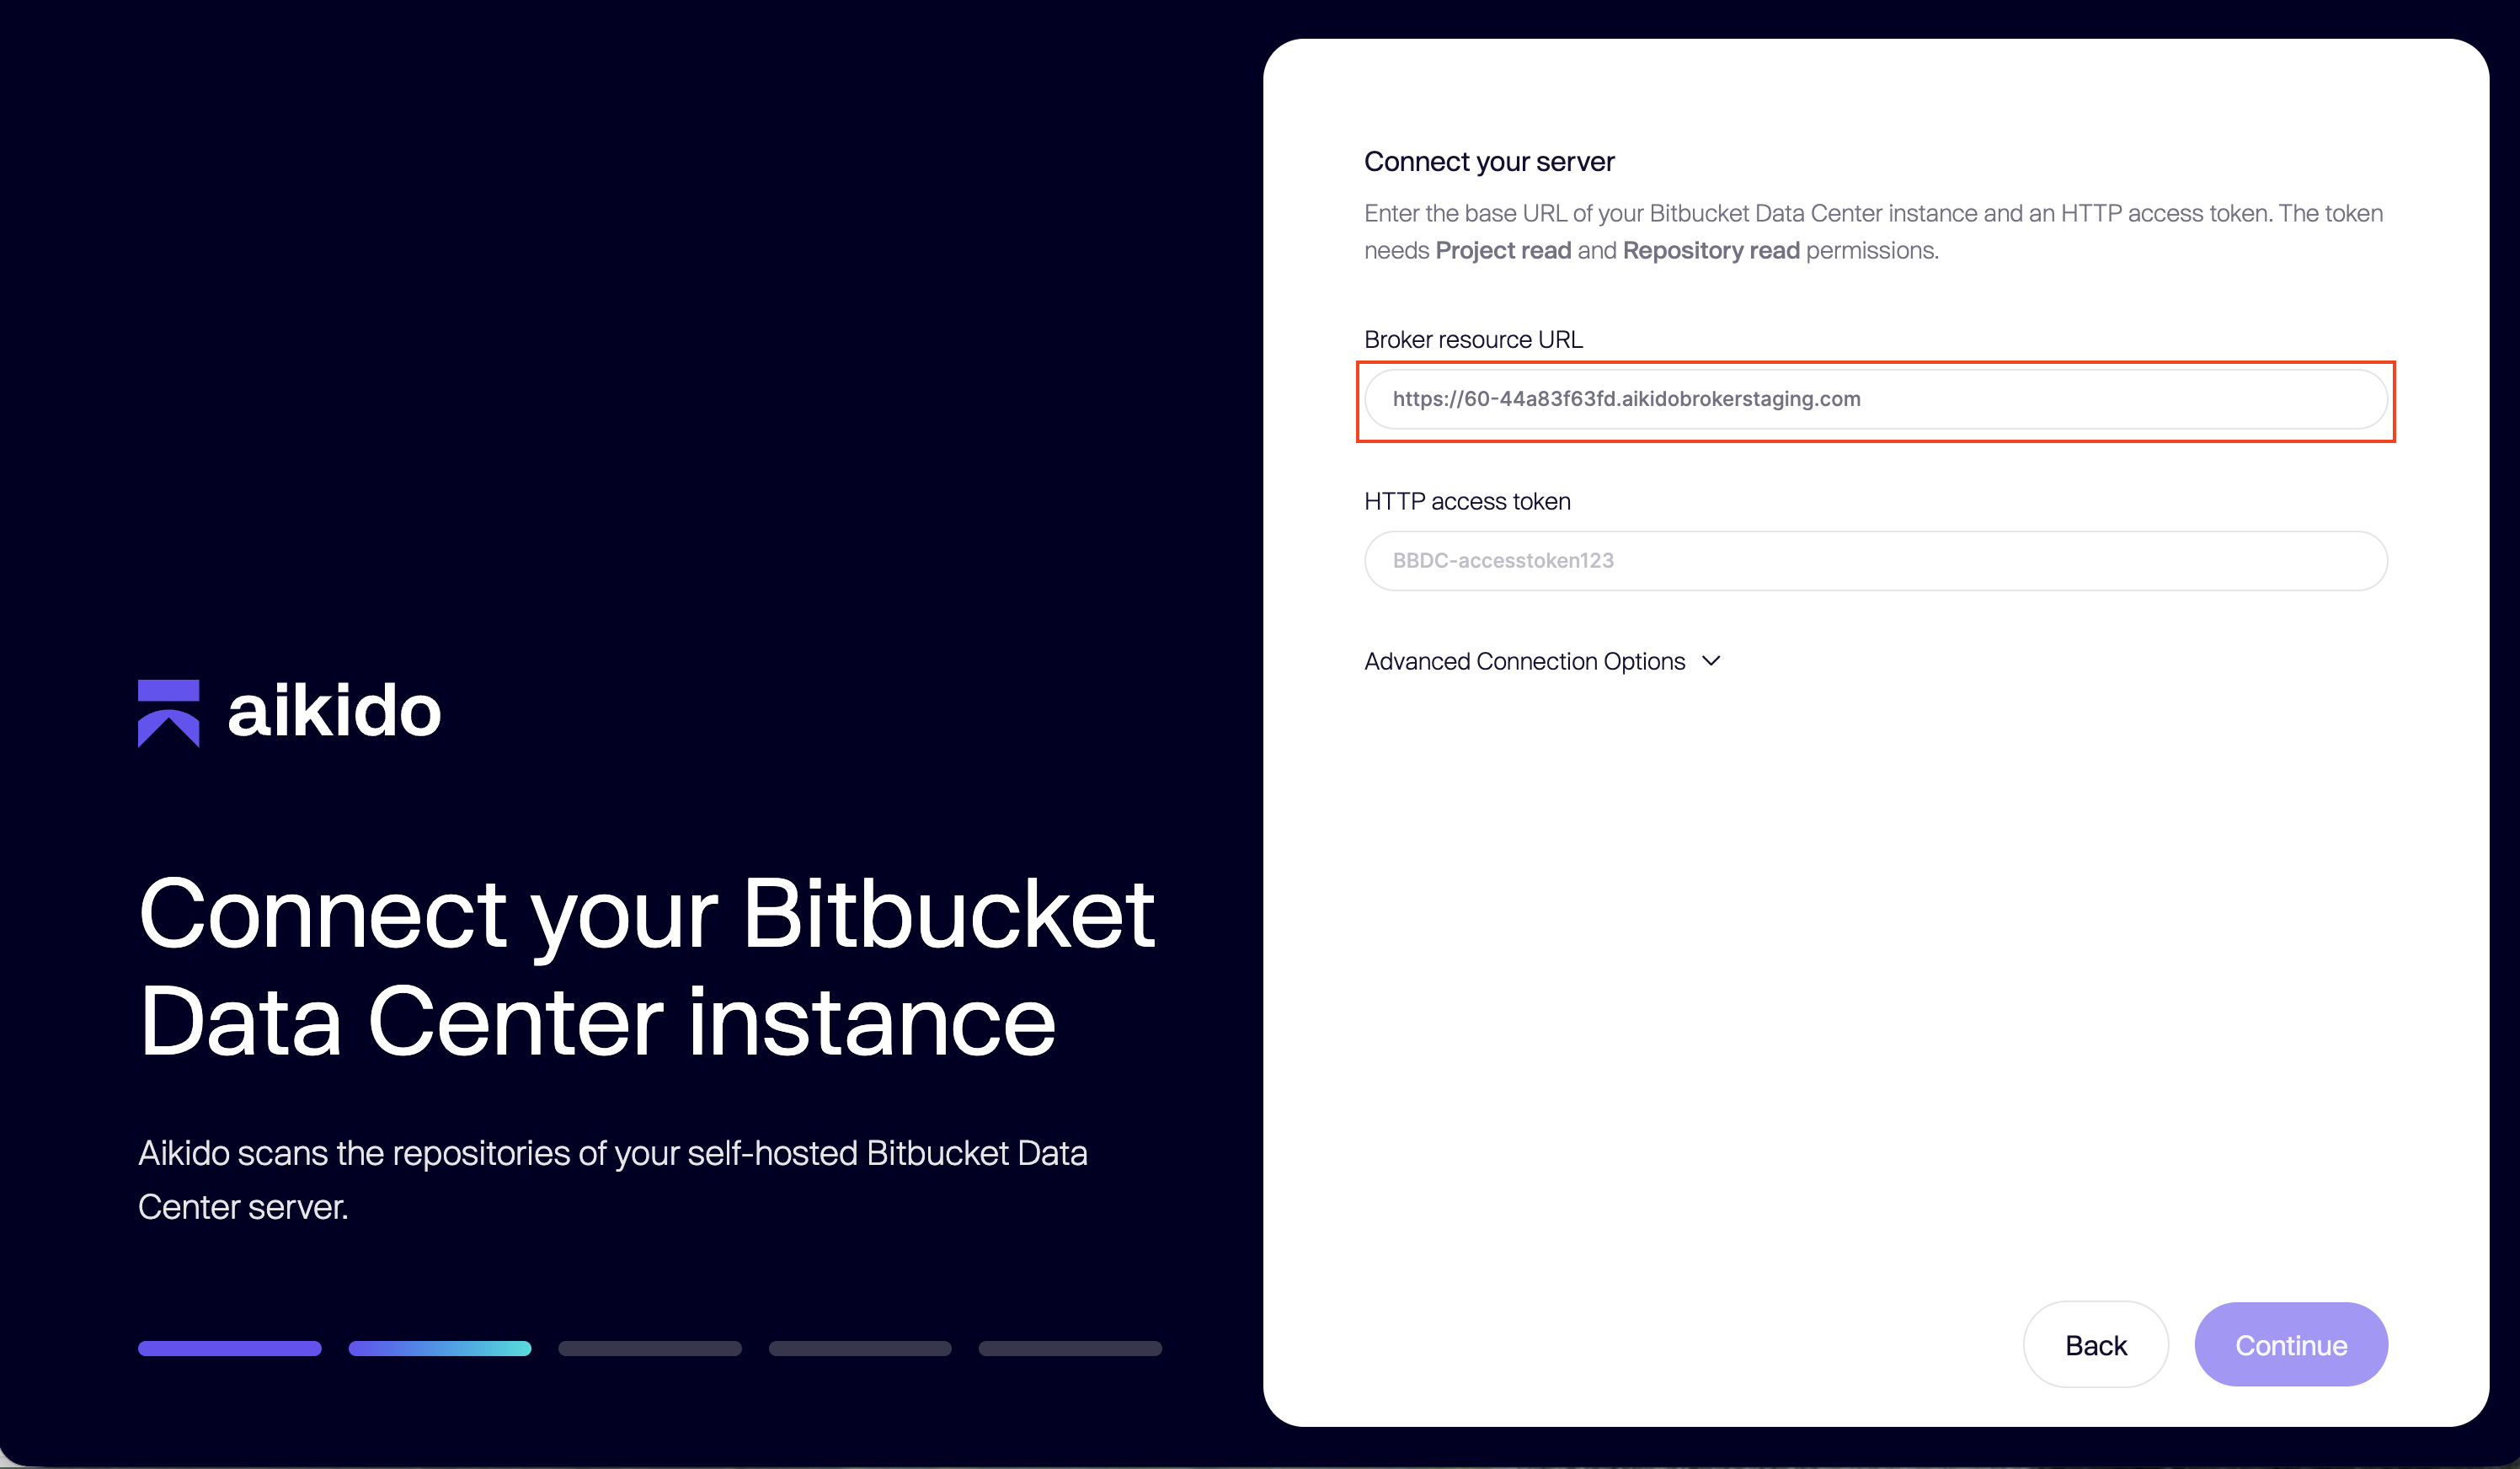
Paste the Broker resource URL from the previous step in the input field for the "server URL".
{% endstep %}
{% step %}
**Create a HTTP Access Token**
You can find the `HTTP access token` under **Profile** → **Manage account** → **HTTP access tokens** → **Create token**.
**Required token permissions**
Aikido requests the following token permissions for your Bitbucket on-premises instance:
* **Project:** Write
* **Repository:** Write
**Why Write access?**
Write access is required to support the full Aikido feature set, including AutoFix (creating merge-ready PRs) and PR checks (posting status checks and comments on pull requests).
**If you only need scanning**
If your team only uses Aikido for repository scanning and AI Pentesting, **Read permissions** are sufficient. You can configure a token with Read-only access and all scanning functionality will work as expected.
{% endstep %}
{% step %}
**Complete the installation**
After you click **Next, Connect Group**, select the group you want to start with. You can always connect more groups later.
In the final step, select the repositories you want Aikido to monitor.
{% endstep %}
{% endstepper %}
---
# Agent Instructions
This documentation is published with GitBook. GitBook is the documentation platform designed so that both humans and AI agents can read, navigate, and reason over technical content effectively. Learn more at gitbook.com.
## Querying This Documentation
If you need additional information that is not directly available in this page, you can query the documentation dynamically by asking a question.
Perform an HTTP GET request on the current page URL with the `ask` query parameter, and the optional `goal` query parameter:
```
GET https://help.aikido.dev/code-scanning/connect-your-source-code/connect-bitbucket-data-center/connect-bitbucket-data-center-broker-set-up.md?ask=&goal=
```
`ask` is the immediate question: it should be specific, self-contained, and written in natural language.
`goal` is optional and describes the broader end goal you are ultimately trying to accomplish on behalf of the user. GitBook uses it to tailor the answer towards what is most useful for that goal.
The response will contain a direct answer to the question and relevant excerpts and sources from the documentation.
Use this mechanism when the answer is not explicitly present in the current page, you need clarification or additional context, or you want to retrieve related documentation sections.