> For the complete documentation index, see [llms.txt](https://help.aikido.dev/llms.txt). Markdown versions of documentation pages are available by appending `.md` to page URLs; this page is available as [Markdown](https://help.aikido.dev/getting-started/core-functionalities/approval-inbox-for-ignored-issues.md).
# Approval Inbox for Ignored Issues
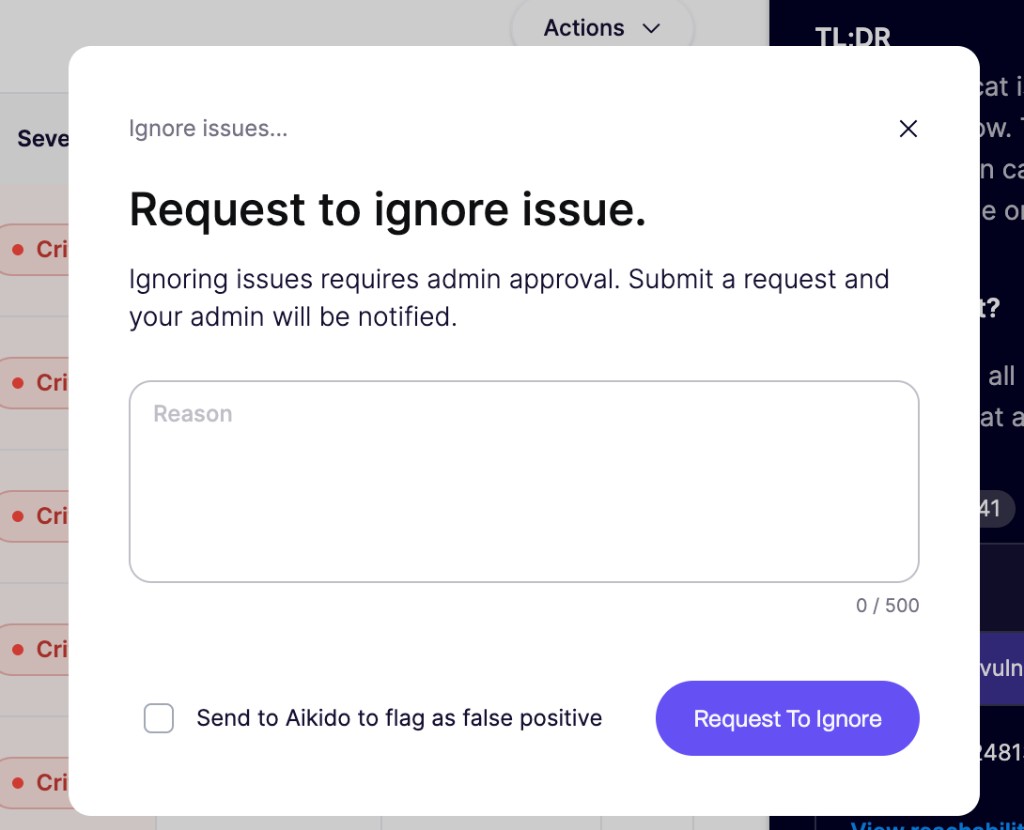
The Request Inbox lets you require sign-off before users without ignore or snooze permissions can dismiss findings. Team members submit a request with a reason, and reviewers approve or reject it in a central inbox before anything is removed from the feed.
## Use cases
* 🛡️ **Governance over risk acceptance**: Keep security leads in control of which findings get ignored.
* 👥 **Empower developers**: Let engineers triage false positives without handing out full ignore rights.
* 📋 **Audit trail**: Every request records who asked, why, and who approved or declined.
## Enabling ignore requests
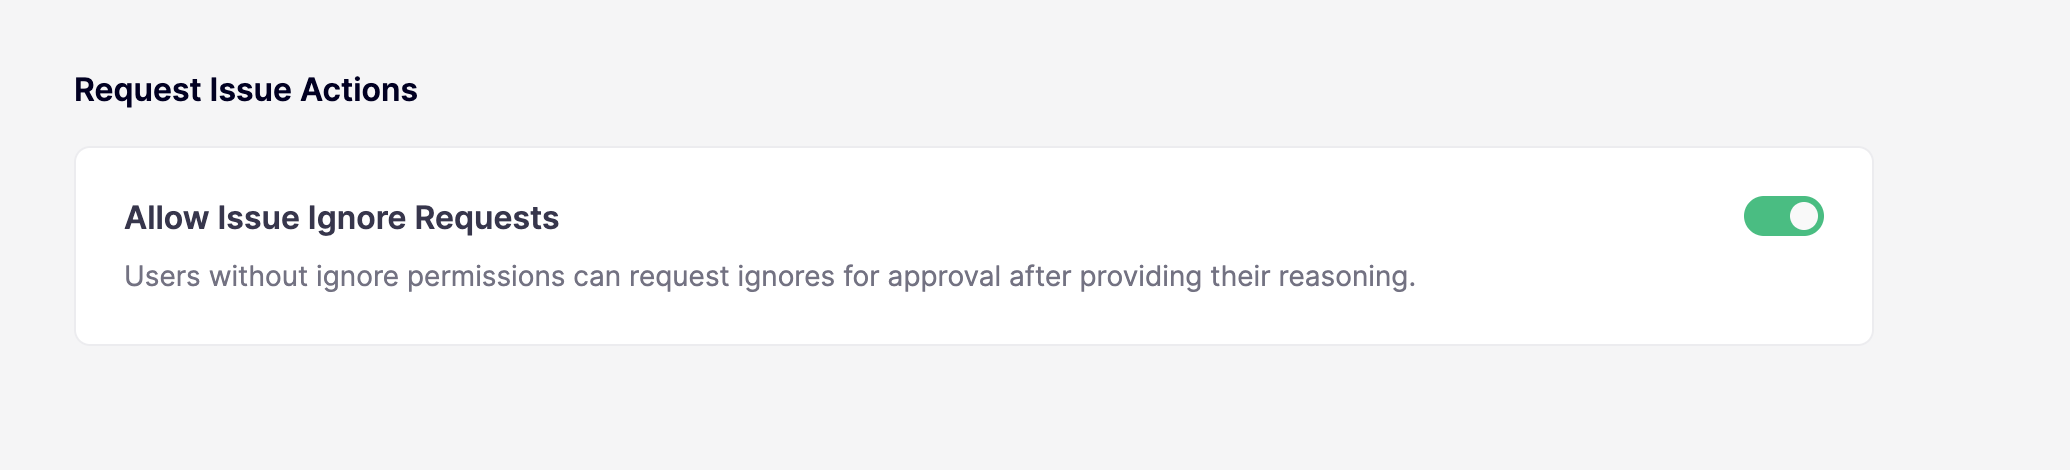
Ignore requests are **not enabled by default**. Only workspace admins can turn them on from the [Triage settings](https://app.aikido.dev/settings/advanced). The same setting also lets users without snooze permissions submit snooze requests.
## How it works
Whether you can ignore or snooze an issue directly depends on your **ignore** and **snooze** permissions (see [Setting Roles and Permissions](/getting-started/automated-user-management/setting-roles-and-permissions.md)) and whether **Allow Issue Ignore Requests** is enabled for your workspace:
* **With the relevant permission**: You ignore or snooze immediately.
* **Without it, with ignore requests enabled**: You submit a request with a reason. The issue stays in the feed until someone with that permission approves or rejects it.
* **Without it, with ignore requests disabled**: You cannot ignore or snooze findings, or submit requests.
The same flow applies when you reply `@AikidoSec ignore: [reason]` on an Aikido [PR or MR comment](/pr-and-release-gating/aikido-ci-gating-functionality/autofix-suggestions-and-inline-commenting-for-pr-checks.md). If you do not have ignore permissions, that request lands in the approval inbox rather than ignoring the finding immediately.
{% hint style="info" %}
Ignore requests apply to **individual subissues only**, including findings in pull requests. Broader ignore rules (by path, CVE, or rule) still require ignore permissions.
{% endhint %}
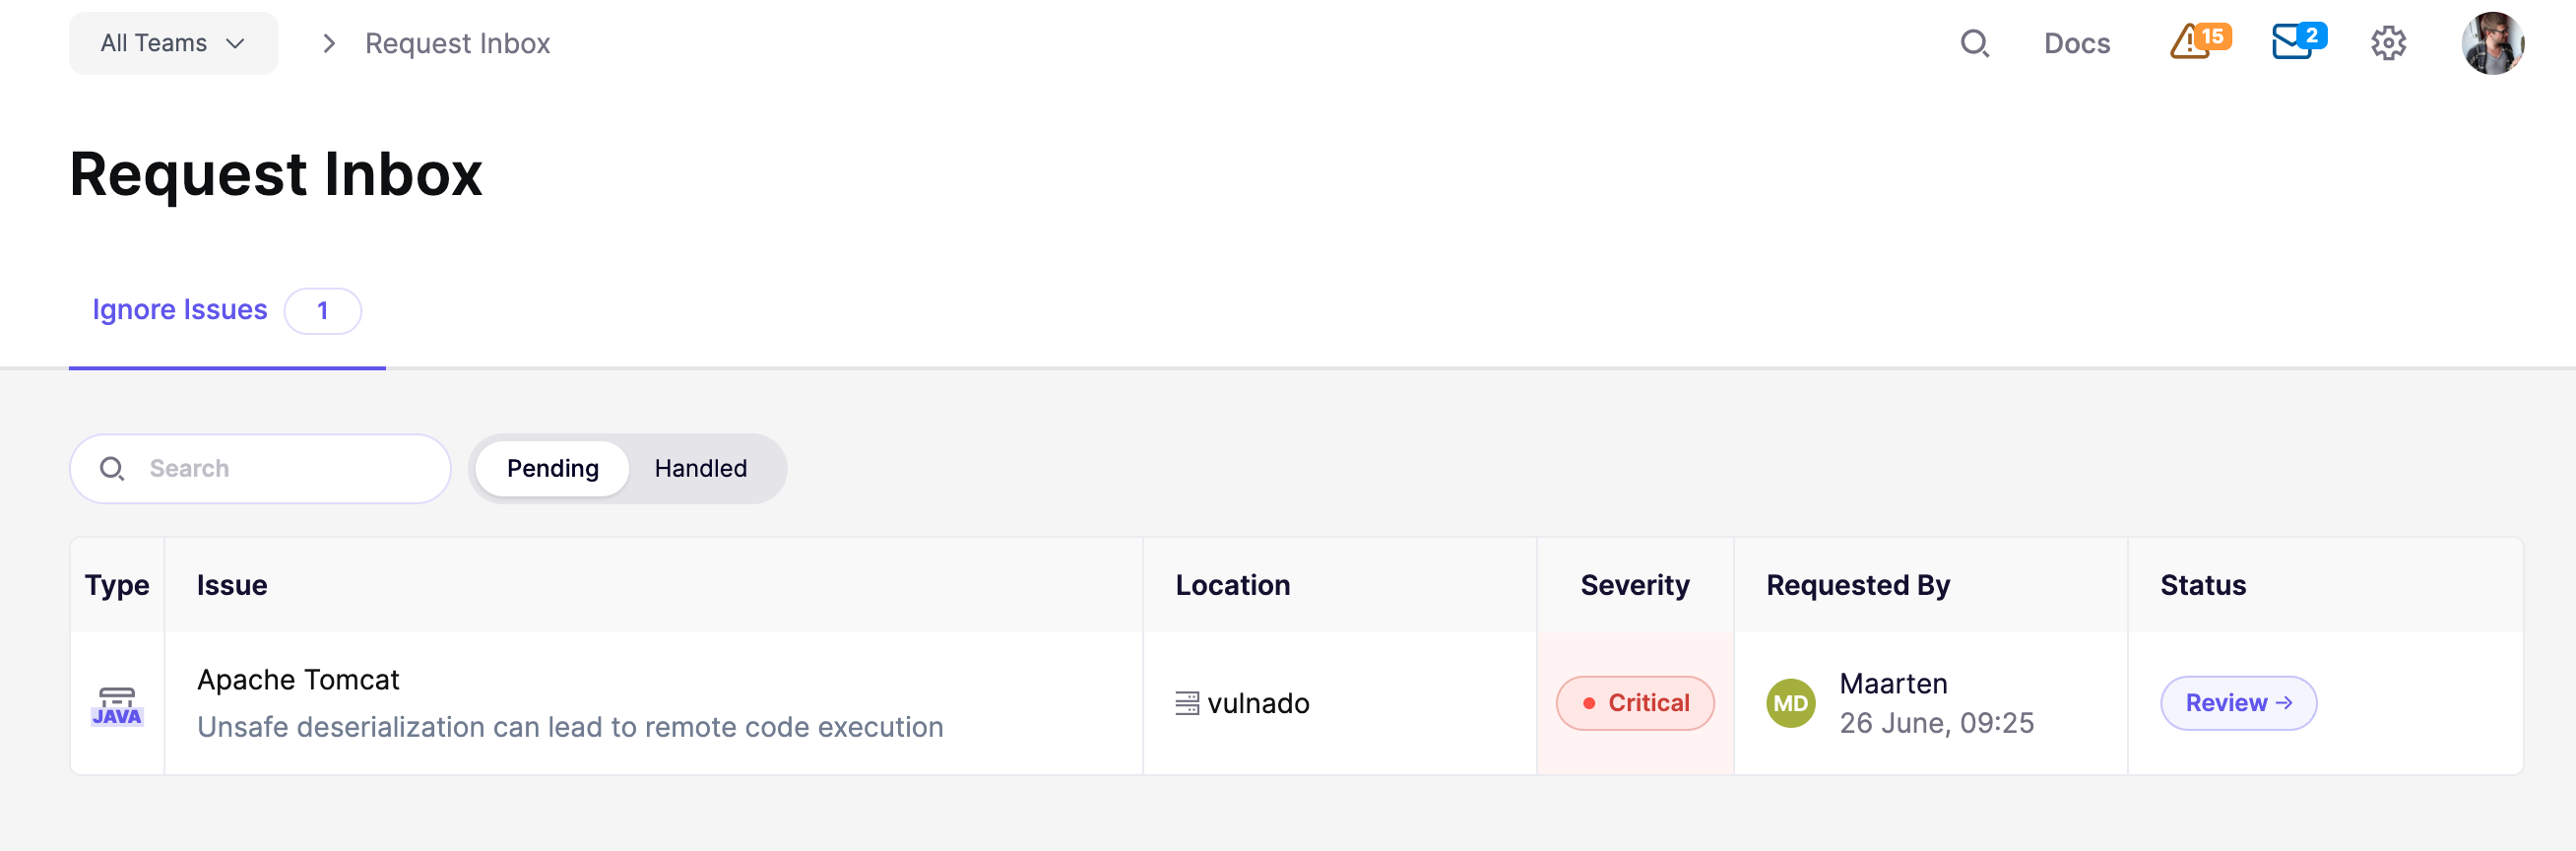
When a user submits a request, users with ignore permissions (except team-only users) are notified and can review it in the [Request Inbox](https://app.aikido.dev/inbox/issues/actions). The inbox lists the issue details, severity, location, requester, and their stated reason. Team-only users cannot review requests, even if they have ignore permissions.
## Review ignore requests
{% stepper %}
{% step %}
### Open the inbox
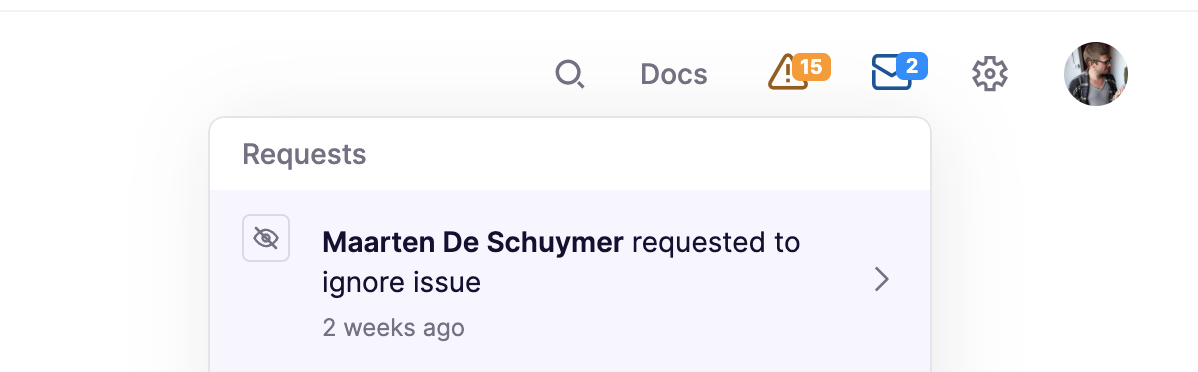
Go to the [Request Inbox](https://app.aikido.dev/inbox/issues/actions), or click a pending notification in the **Requests** indicator in the top navigation. Open the **Ignore Issues** tab if it isn't already selected. The tab shows a badge with the number of pending requests.
{% endstep %}
{% step %}
### Review a request
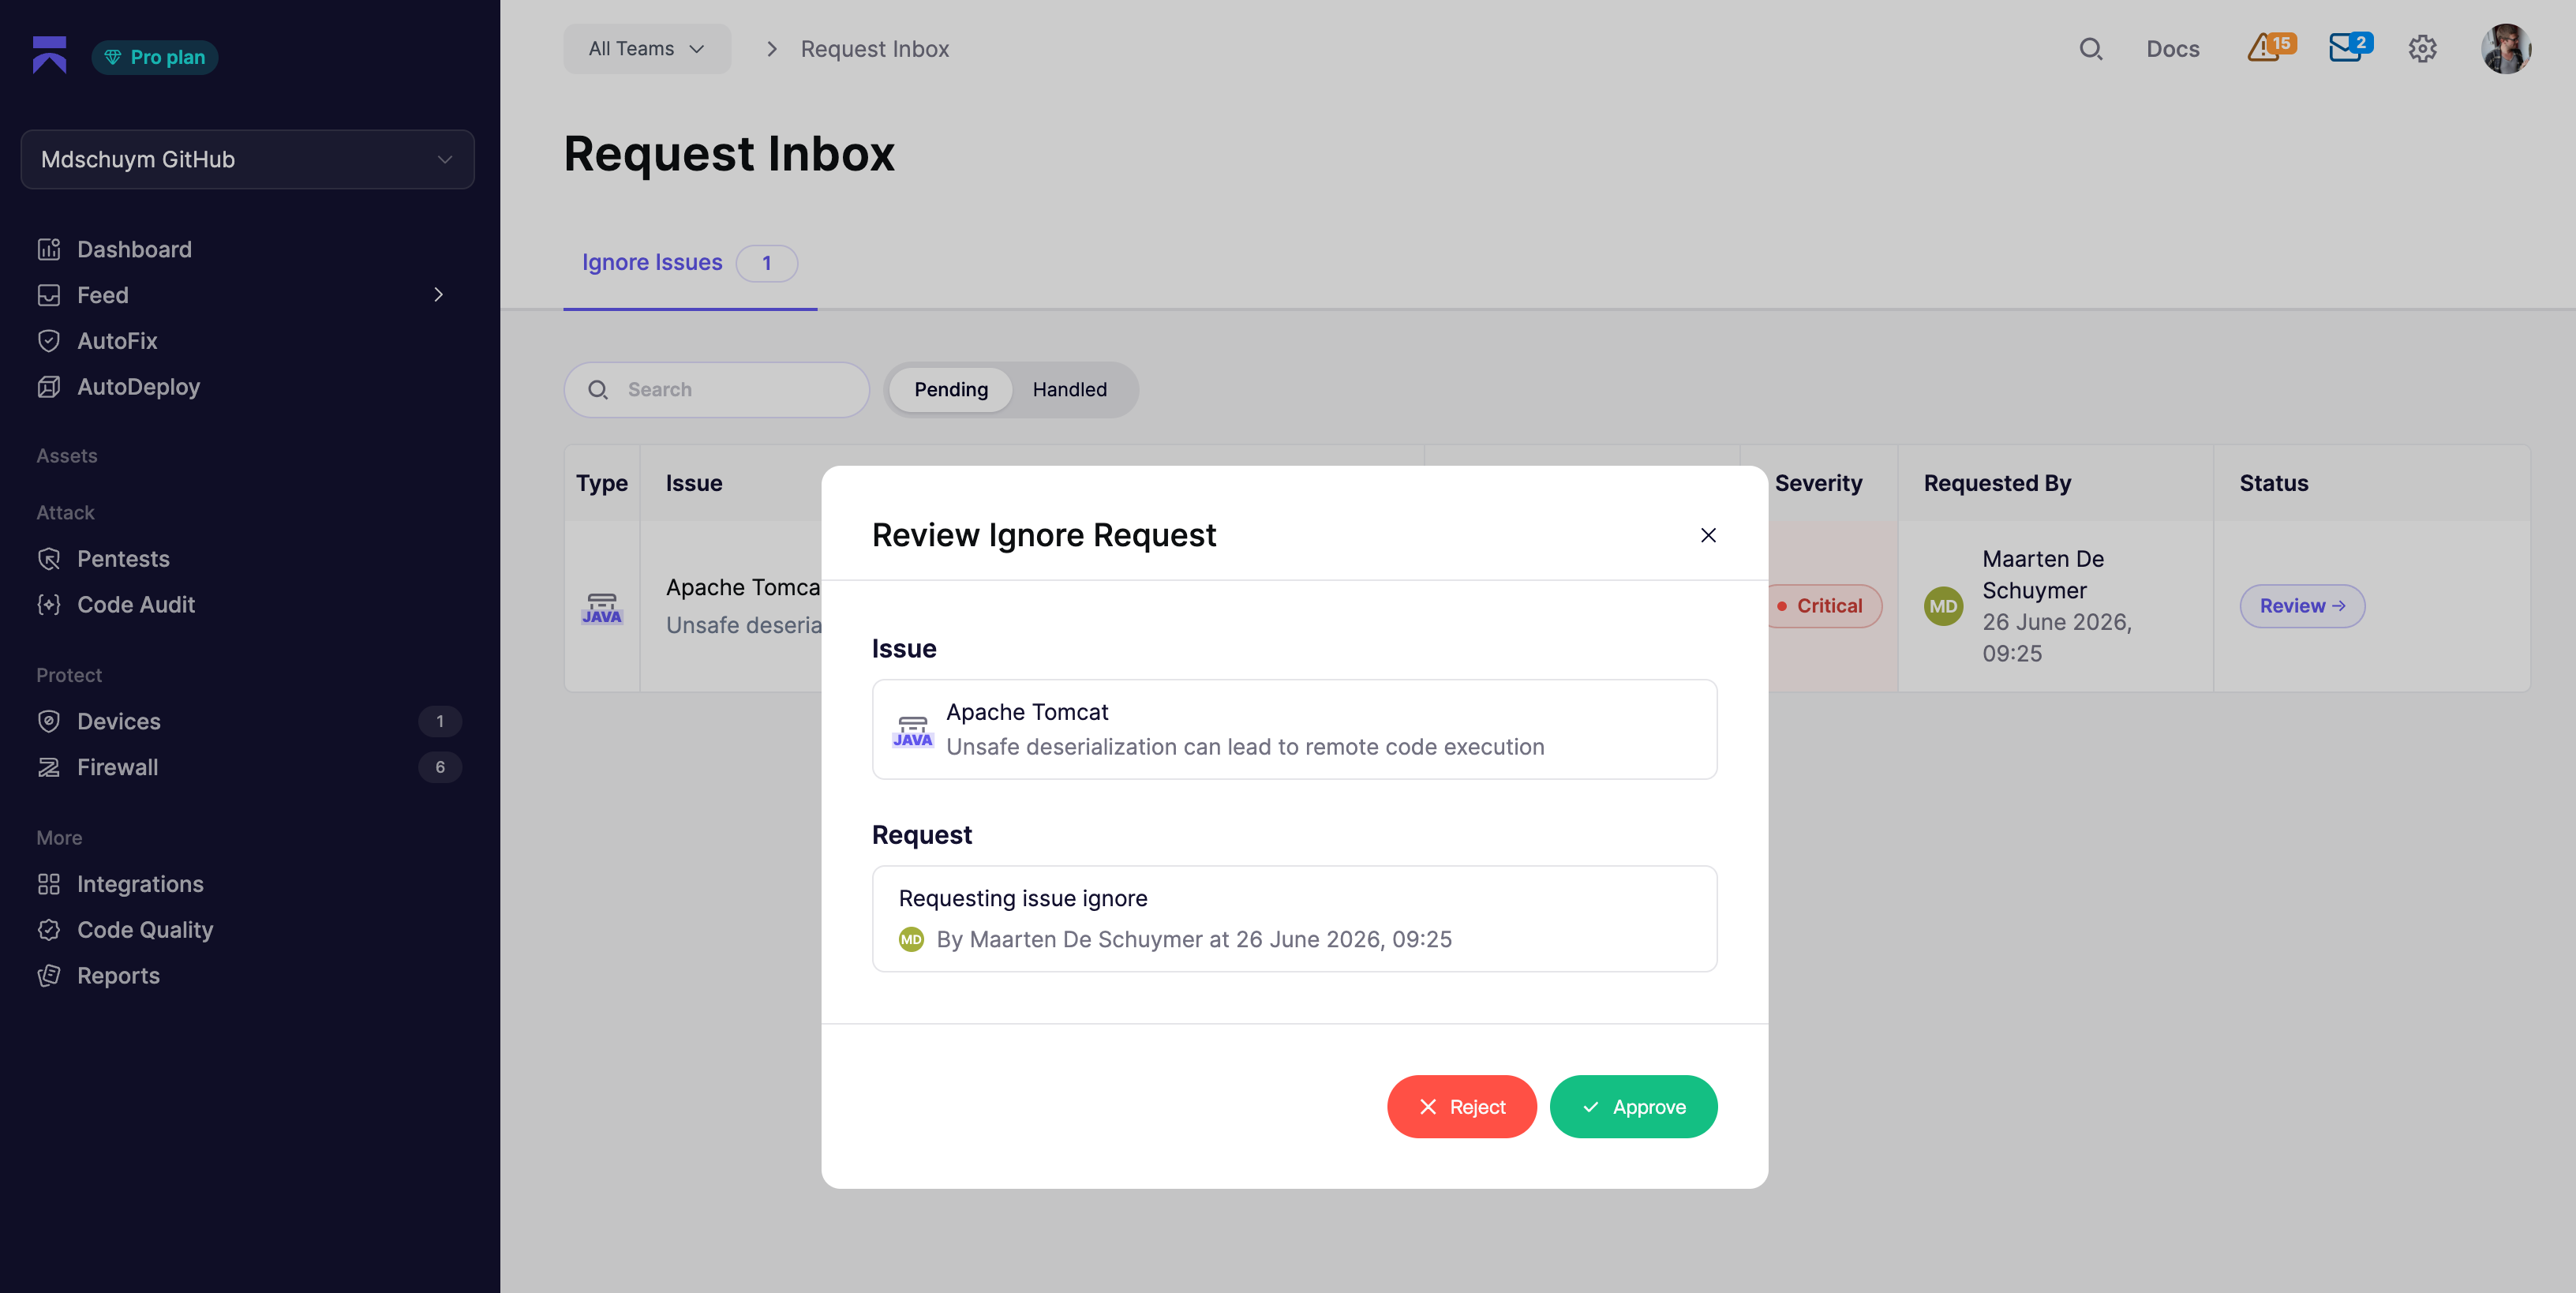
Click a row or the **Review** button on a pending request. The review modal shows the issue, the requester's reason, and the snooze date when the request is for a snooze.
{% endstep %}
{% step %}
### Approve or reject
Click **Approve** to apply the requested ignore or snooze with the requester's stated reason, or **Reject** to decline the request and leave the issue as it is.
{% endstep %}
{% endstepper %}
### Pending and handled
The **Ignore Issues** tab has two views:
* **Pending**: Requests waiting for a decision.
* **Handled**: Requests that have already been approved or rejected, including who reviewed them and when.
Use the search bar to filter by issue title or requester name. If you have a team filter active in Aikido, the inbox only shows requests for issues in that team.
### What happens after a decision
**Approved**: Aikido applies the requested ignore or snooze using the requester's reason. Ignored findings move to the [ignored view](https://app.aikido.dev/issues/ignored) and disappear from the main feed.
**Rejected**: The issue stays open or snoozed in the feed. The requester can submit a new request if needed.
## Notifications
Users with ignore permissions (except team-only users) see new requests in the **Requests** indicator in the top navigation. Each notification shows who submitted it and whether they asked to ignore or snooze. Click the notification, or **Go to Request Inbox**, to open the inbox.
### Slack notifications
You can also receive Slack alerts when a new ignore or snooze request is submitted. Aikido posts a message to your chosen channel with a **Review in Aikido** button that links directly to the Request Inbox.
{% stepper %}
{% step %}
### Connect Slack
If you haven't already, connect Slack from [Slack integration settings](https://app.aikido.dev/settings/integrations/notifications/slack). See [Slack Notifications](/getting-started/chat-and-alerts/slack-notifications.md) for setup steps.
{% endstep %}
{% step %}
### Create a Slack alert
Go to the [Request Inbox](https://app.aikido.dev/inbox/issues/actions), open the **Ignore Issues** tab, and click **Manage Alerts** → **Slack**. Click **Create Alert** and select the channel that should receive request notifications.
{% endstep %}
{% step %}
### Test the alert
After saving, use **Send test alert** on the alert row to confirm messages arrive in the selected channel.
{% endstep %}
{% endstepper %}
---
# Agent Instructions
This documentation is published with GitBook. GitBook is the documentation platform designed so that both humans and AI agents can read, navigate, and reason over technical content effectively. Learn more at gitbook.com.
## Querying This Documentation
If you need additional information that is not directly available in this page, you can query the documentation dynamically by asking a question.
Perform an HTTP GET request on the current page URL with the `ask` query parameter, and the optional `goal` query parameter:
```
GET https://help.aikido.dev/getting-started/core-functionalities/approval-inbox-for-ignored-issues.md?ask=&goal=
```
`ask` is the immediate question: it should be specific, self-contained, and written in natural language.
`goal` is optional and describes the broader end goal you are ultimately trying to accomplish on behalf of the user. GitBook uses it to tailor the answer towards what is most useful for that goal.
The response will contain a direct answer to the question and relevant excerpts and sources from the documentation.
Use this mechanism when the answer is not explicitly present in the current page, you need clarification or additional context, or you want to retrieve related documentation sections.
 {% hint style="info" %}
Ignore requests apply to **individual subissues only**, including findings in pull requests. Broader ignore rules (by path, CVE, or rule) still require ignore permissions.
{% endhint %}
When a user submits a request, users with ignore permissions (except team-only users) are notified and can review it in the [Request Inbox](https://app.aikido.dev/inbox/issues/actions). The inbox lists the issue details, severity, location, requester, and their stated reason. Team-only users cannot review requests, even if they have ignore permissions.
## Review ignore requests
{% stepper %}
{% step %}
### Open the inbox
Go to the [Request Inbox](https://app.aikido.dev/inbox/issues/actions), or click a pending notification in the **Requests** indicator in the top navigation. Open the **Ignore Issues** tab if it isn't already selected. The tab shows a badge with the number of pending requests.
{% hint style="info" %}
Ignore requests apply to **individual subissues only**, including findings in pull requests. Broader ignore rules (by path, CVE, or rule) still require ignore permissions.
{% endhint %}
When a user submits a request, users with ignore permissions (except team-only users) are notified and can review it in the [Request Inbox](https://app.aikido.dev/inbox/issues/actions). The inbox lists the issue details, severity, location, requester, and their stated reason. Team-only users cannot review requests, even if they have ignore permissions.
## Review ignore requests
{% stepper %}
{% step %}
### Open the inbox
Go to the [Request Inbox](https://app.aikido.dev/inbox/issues/actions), or click a pending notification in the **Requests** indicator in the top navigation. Open the **Ignore Issues** tab if it isn't already selected. The tab shows a badge with the number of pending requests.